Circuit bending cameras
If you have read some of my previous posts, I think now you know that I'm "a little" prone to rabbit holes. This post is about the niche world of circuit bending cameras.
Let's first answer the question, what is circuit bending?
According to Wikipedia: "Circuit bending is the creative, chance-based customization of the circuits within electronic
devices such as low-voltage, battery-powered guitar effects, children's toys, and digital synthesizers to create new musical
or visual instruments and sound generators."
That's a lot of words to say "Pirates! We solder bits here and there and see what happens! Arrrr!". (。•‿-)۶ (<- pirate emoji).
Circuit bending for musical purposes, it's pretty popular and you can find some very good videos and tutorials about this topic. But something that isn't reported everywhere is that you can apply the same principle on the camera's sensors too! This produces noise, distortion, and glitches in the photo taken. The best examples are found on the subreddit r/circuitbending (where I lurked in the comments section trying to learn something on the topic).
I decided to step into this hobby because I love all this lo-fi crap. Plus, I already have everything I need to craft it. To start it you just need a soldering station, some copper wires, resistors, and potentiometers. Obviously, you also need a digital camera. The best ones are the ones from the 90s or early 00s. The newer ones tend to be too small and complicated to work with. I was lucky enough to find a couple of good deals on eBay and get one for free from my colleague.
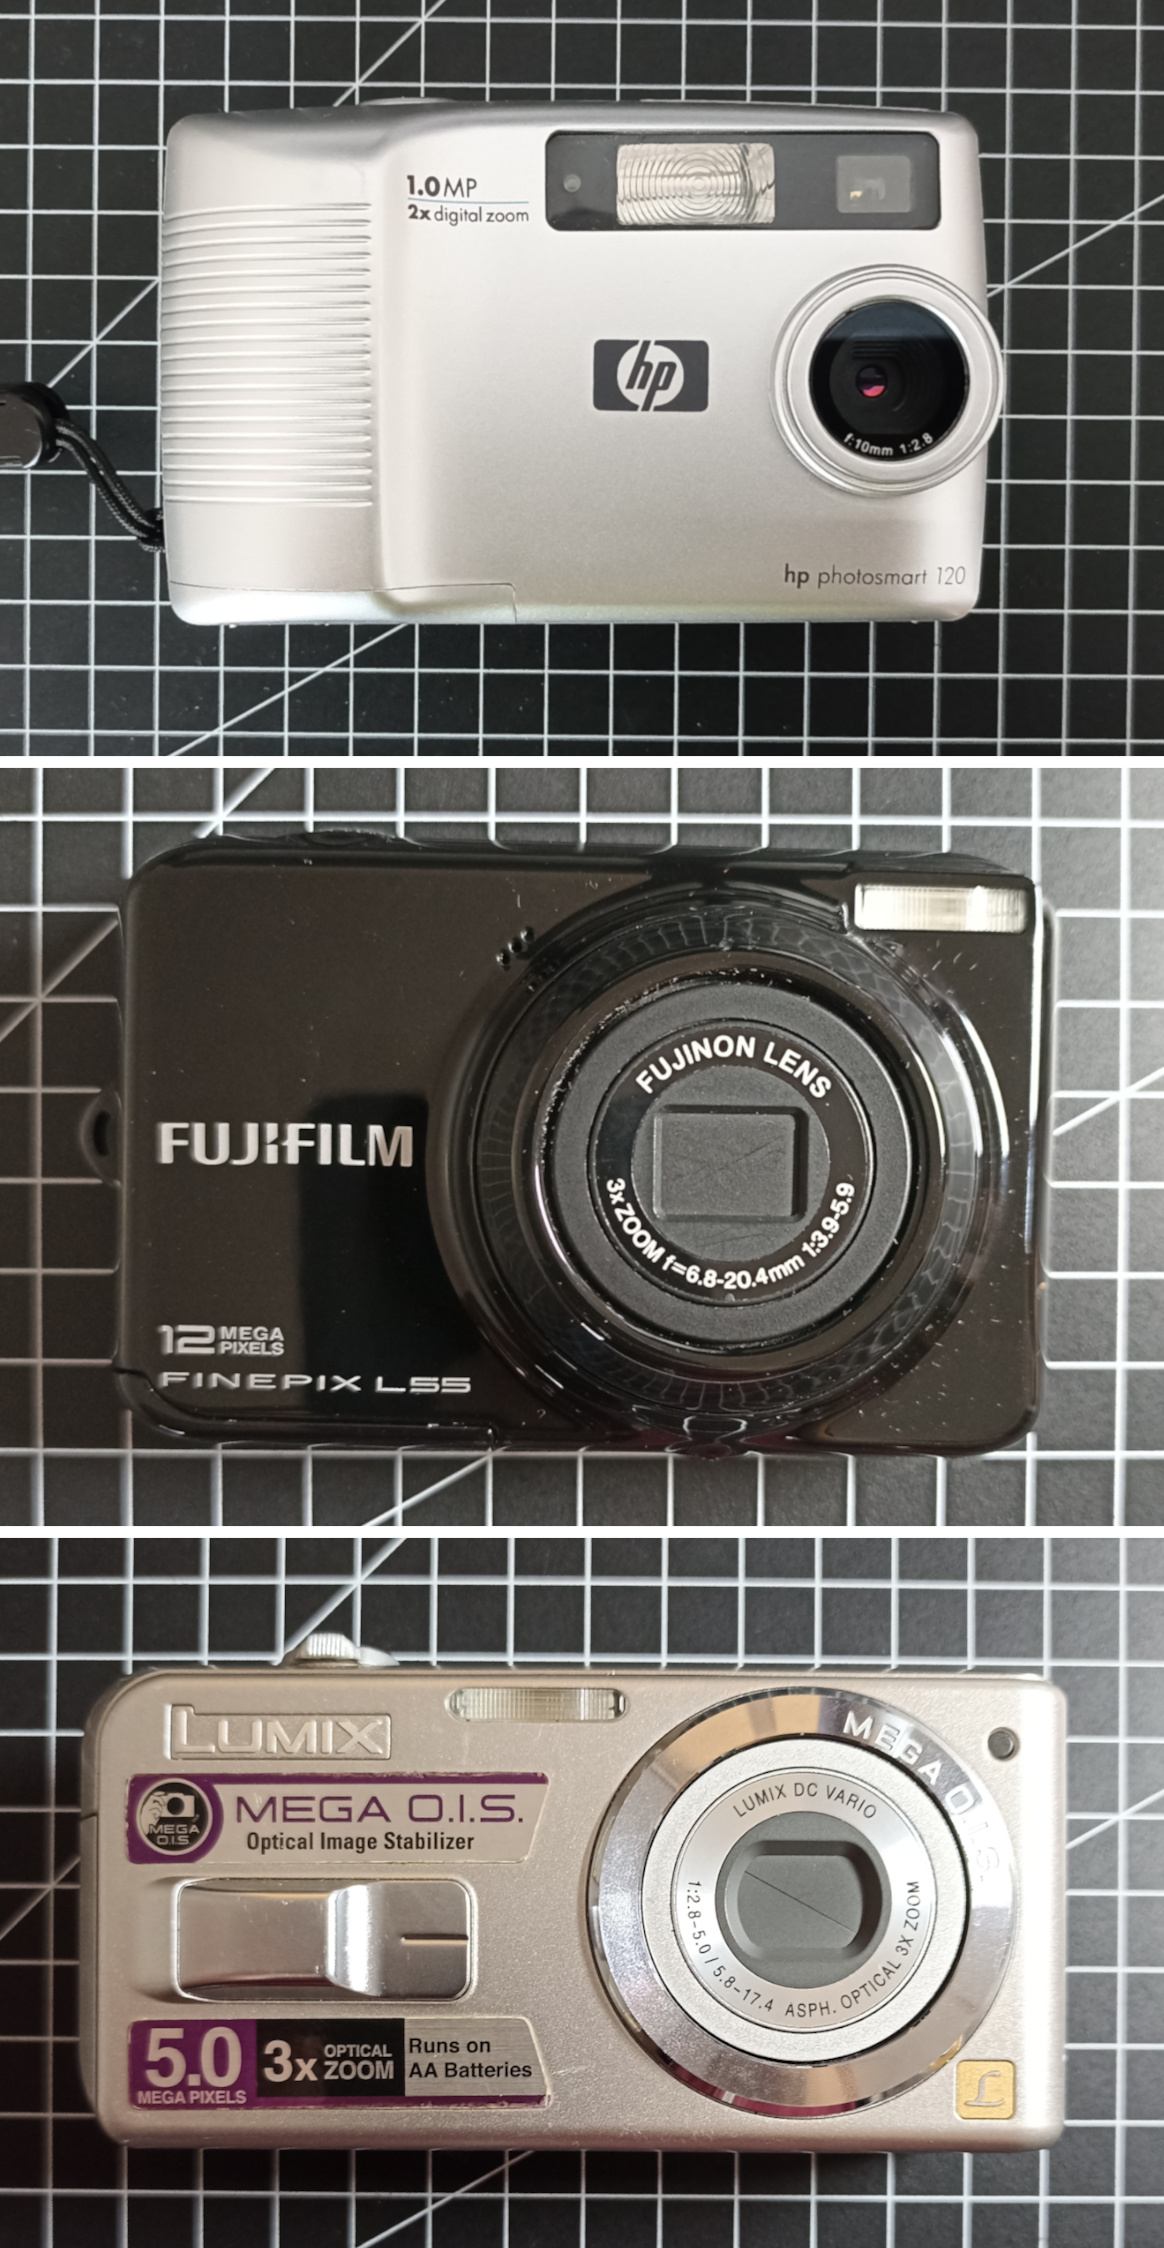
I started with the HP Photosmart 120 because it was the oldest and could be the easiest to mod.
The only downside about this camera is that it works only with compact flash cards.
Not too dramatic, but I will have to find one because, you know, we're in 2023 LOL.
During the teardown I found myself struggling to handle the screws' organization.
So I took a break and designed this thing
(Printables and
Thingiverse). Now I can continue on a more organized desk!

As suggested in some videos I checked the flash capacitor and after confirming that it was fully charged, I tried to discharge it. This is the best practice to prevent unwanted burn of components. I picked a 10k resistor and... it exploded! This wasn't my best start LOL.
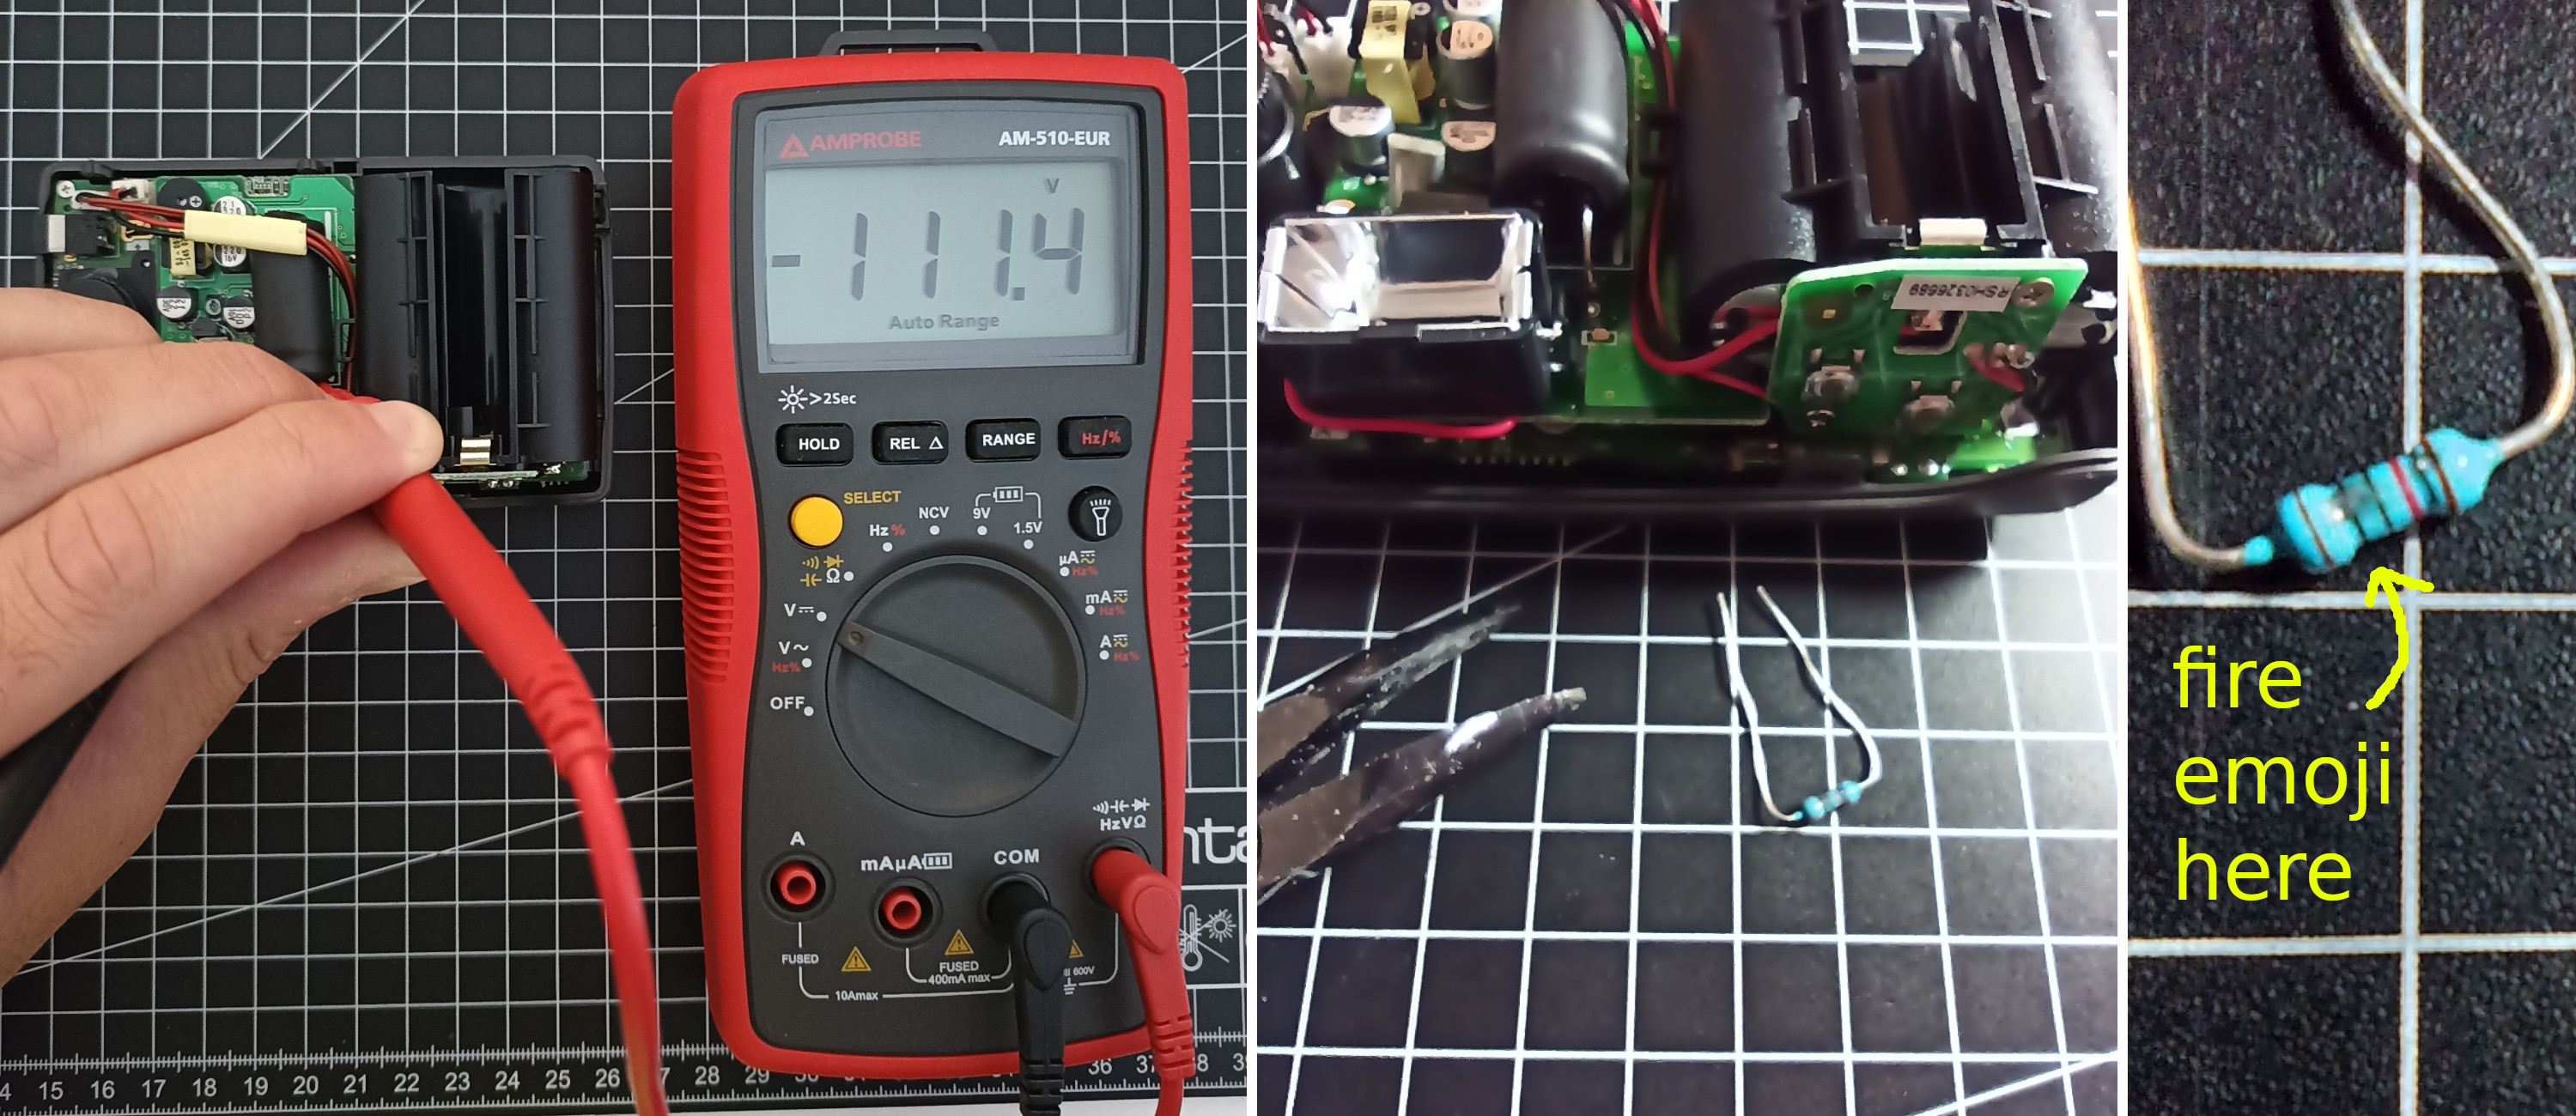
So, I retried with a 100k and it worked fine.
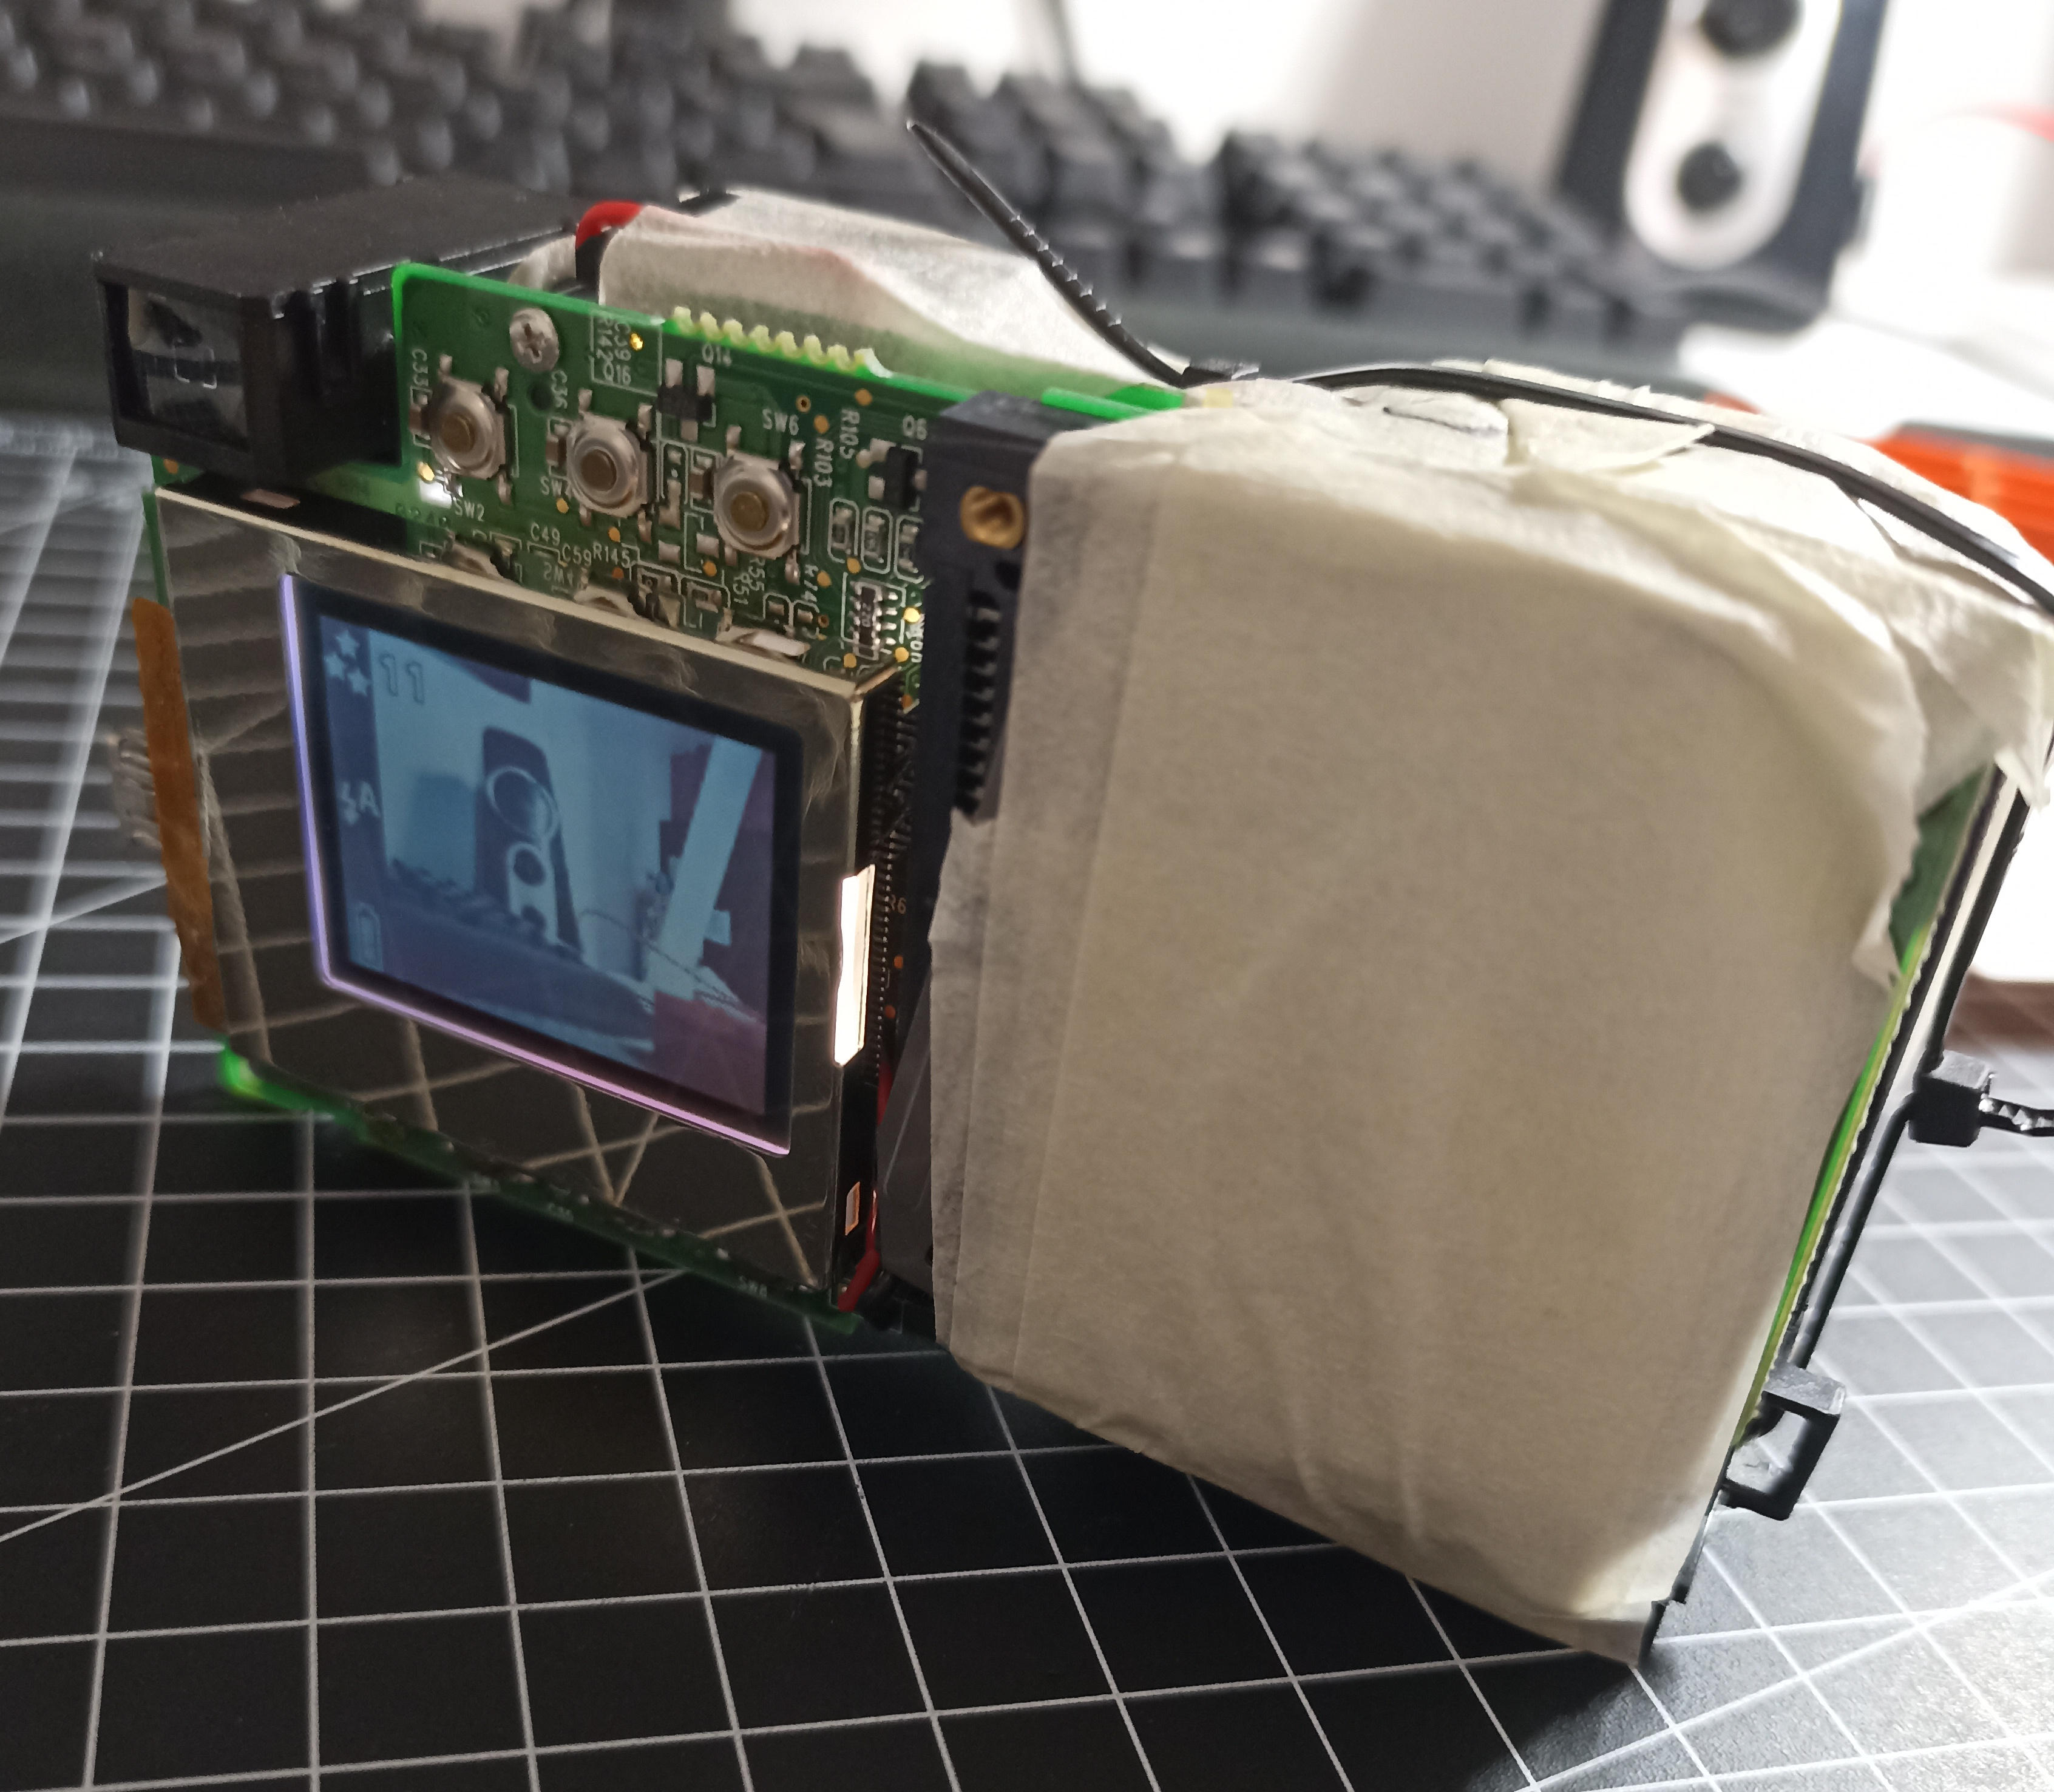
In the middle of the disassembly process, I realized that the pins I had to short were on the inner side of the PCB sandwich.
This made it harder to find the right pinouts to achieve some glitches.
I tried with the PCBs taken apart, but I couldn't see what I was doing on the display.
A possible solution could be to craft a wiring set between all the pins and then retry with split boards.

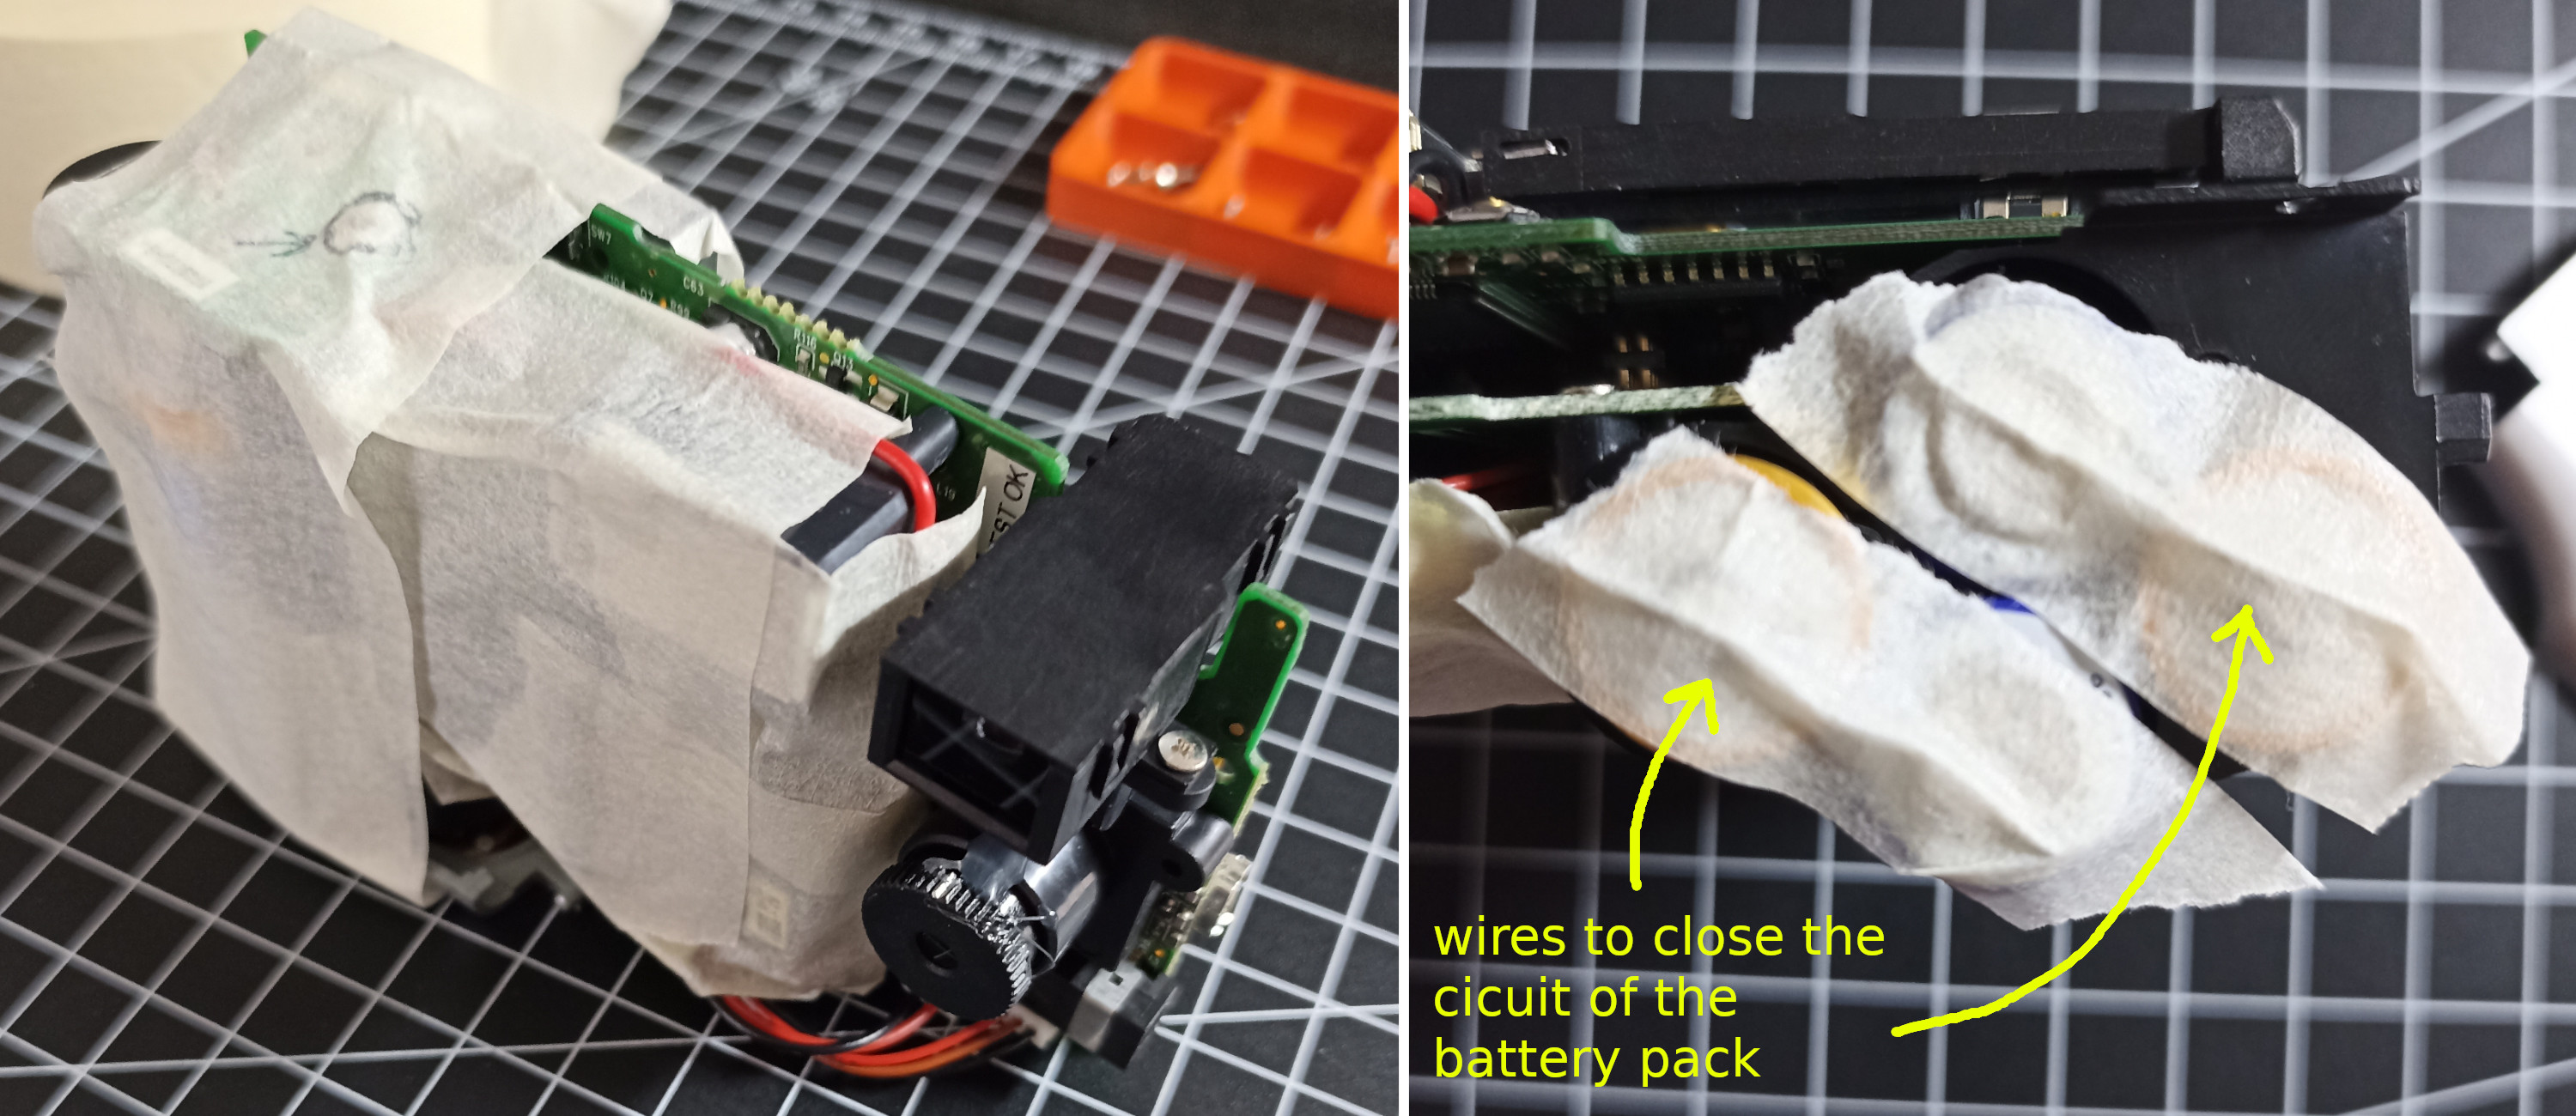
Editor's note: to make it work without the case I had to put the batteries in, but the springs were too powerful and kept pushing batteries out and around. So, I tape them to make a stable contact between poles. That's why it looks like the Mummy. A more comfortable way to achieve this could be a laboratory power supply.
At this point, I've decided to leave this camera aside for the moment and try again my luck with another one.
I picked the FUJIFILM Finepix L55. This was the one in which I had the least hope to succeed because it's a 2011 camera.
I bought it because it was only 5€. In fact, it lasted about 5 minutes in my hands LOL.
I disassembled it without trouble and used some putty rubber to keep the screen out of the way and expose
the side flat connector coming (I think) from the sensor.
In this setup, I can keep the screen on and see how touching the pins affects images.
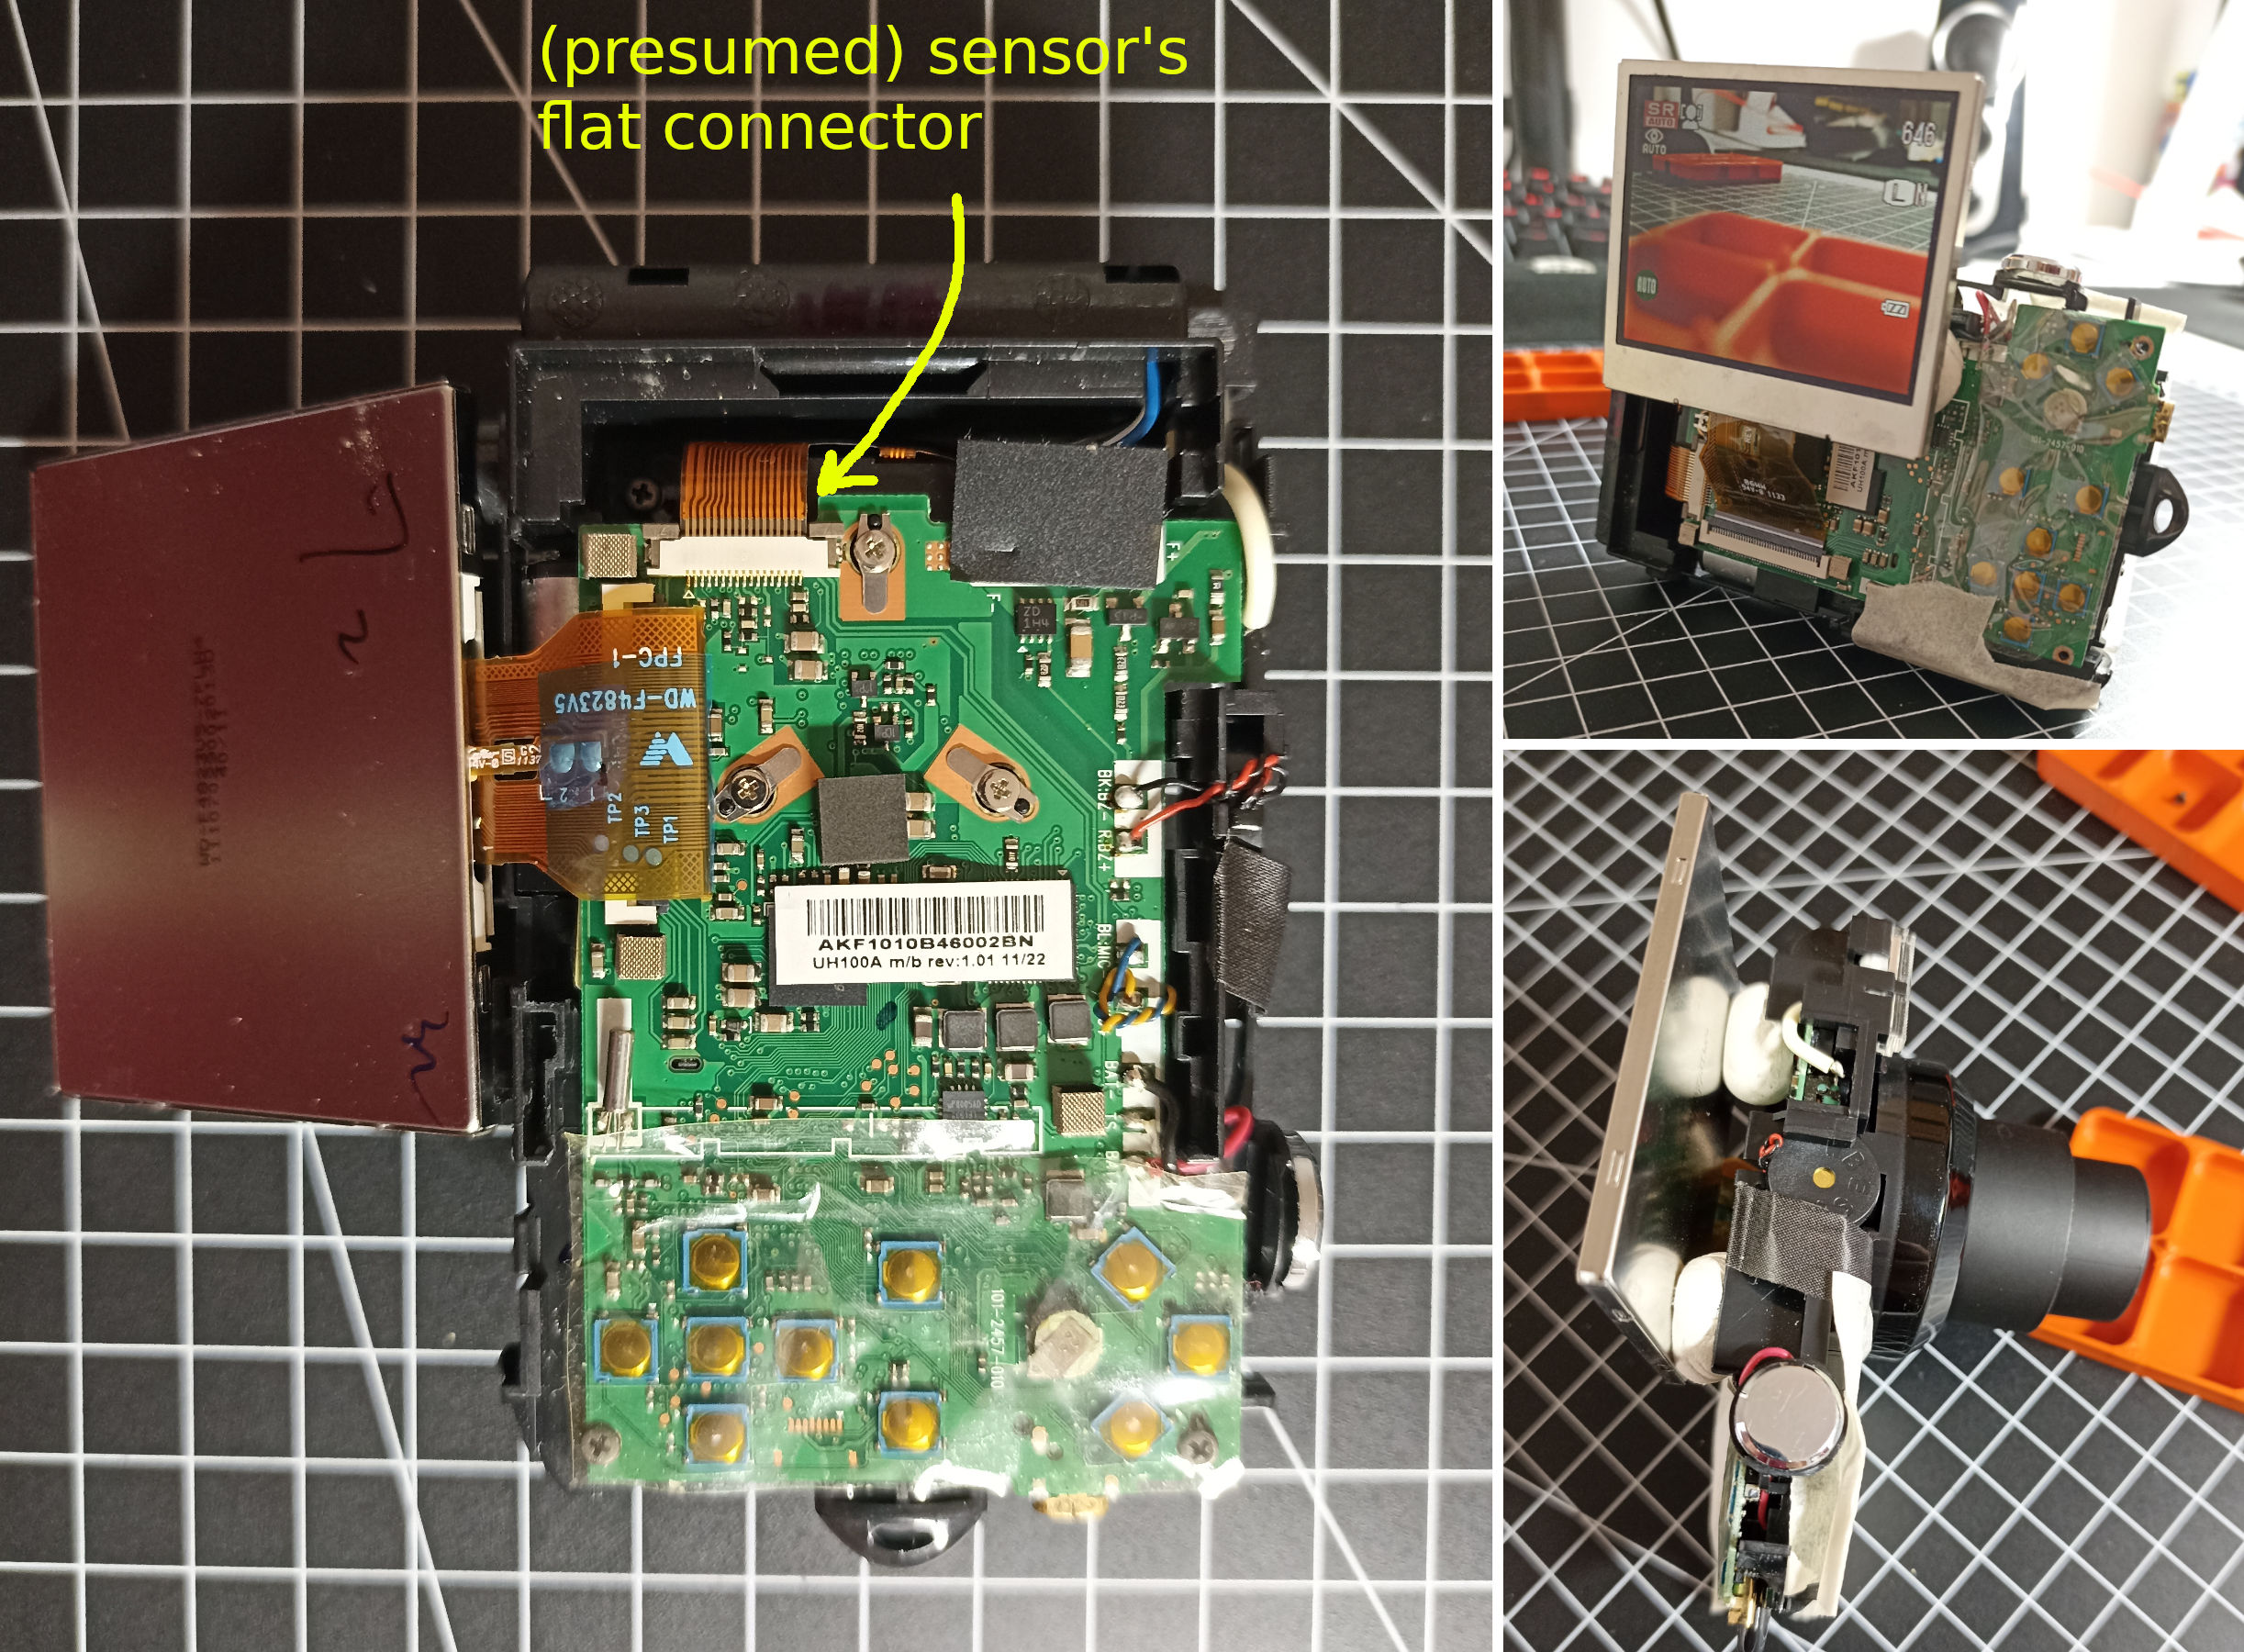
As soon as I started grounding pins the camera turned off, retracting the optics as well. This camera never powered on again. RIP (╥﹏╥)
The last one was a PANASONIC DMC-LS3 (LUMIX mega O.I.S.). I love the aesthetic of this compact camera.
This was the one I dreamed of succeeding because, on top of the look, it has an SD card and runs on AA batteries.
I kept it as my last chance because I thought I could have some experience from the previous mistakes.
I take everything I could apart and it wasn't easy because there were a lot of hidden screws.
This camera is built like a tank! I didn't even find the sensors to try to follow the connection and find some exposing pins to test.

I was exhausted, so I decided to reassemble it before putting it away and retrying again next week.
After I close the last screw I test it and the screen stays blank. I think I've messed this up too. Press F to pay respect.
So, in the end, I have one camera broken, one mounted but with an unworking screen (I hope temporarily), and one covered in bandages.
Well, I definitely need to get down to searching for other resources and upgrade my detective skills to identify the correct pins to connect.
January 2024 update: the best reference materials I have found until now are:
- An Imgur tutorial from this Reddit post;
- NOYSTOISE's blogpost is full of photos, tips an tricks;
- uglatto Instagram, full of beautiful looking mod, and each one with a brief explanation in the description;
- uglatto Reddit page where you can read some interesting comments, unluckily seems no longer very active here;
- ElonMuscular_420 (LOL, nice nick tough) on Reddit, which seems still active in the community;
- glitchwerks on Instagram and on Reddit, which I think is the most famous seller out there;
- lofi future website, not strictly about cameras but a worthwhile read;
- Pushkar Brand how to glitch page.
Bonus: proof that the HP camera is working.