norns shield part 2
ed: this is a follow-up. If you haven't already, read the first part of this story.
For the second iteration of the series "Making of norns shield", I decided to build it on the 210330 PCB version. This version has more robust through-hole jacks in and out and better noise isolation. I had to order everything again, so this was a no-brainer for me to switch to the improved model. Just for clarity: there is an even newer PCB (version 211028) with a different audio codec from the CS4270 (which sabotaged my previous build), but the authors highly recommend the 210330. That's why I stick with it.
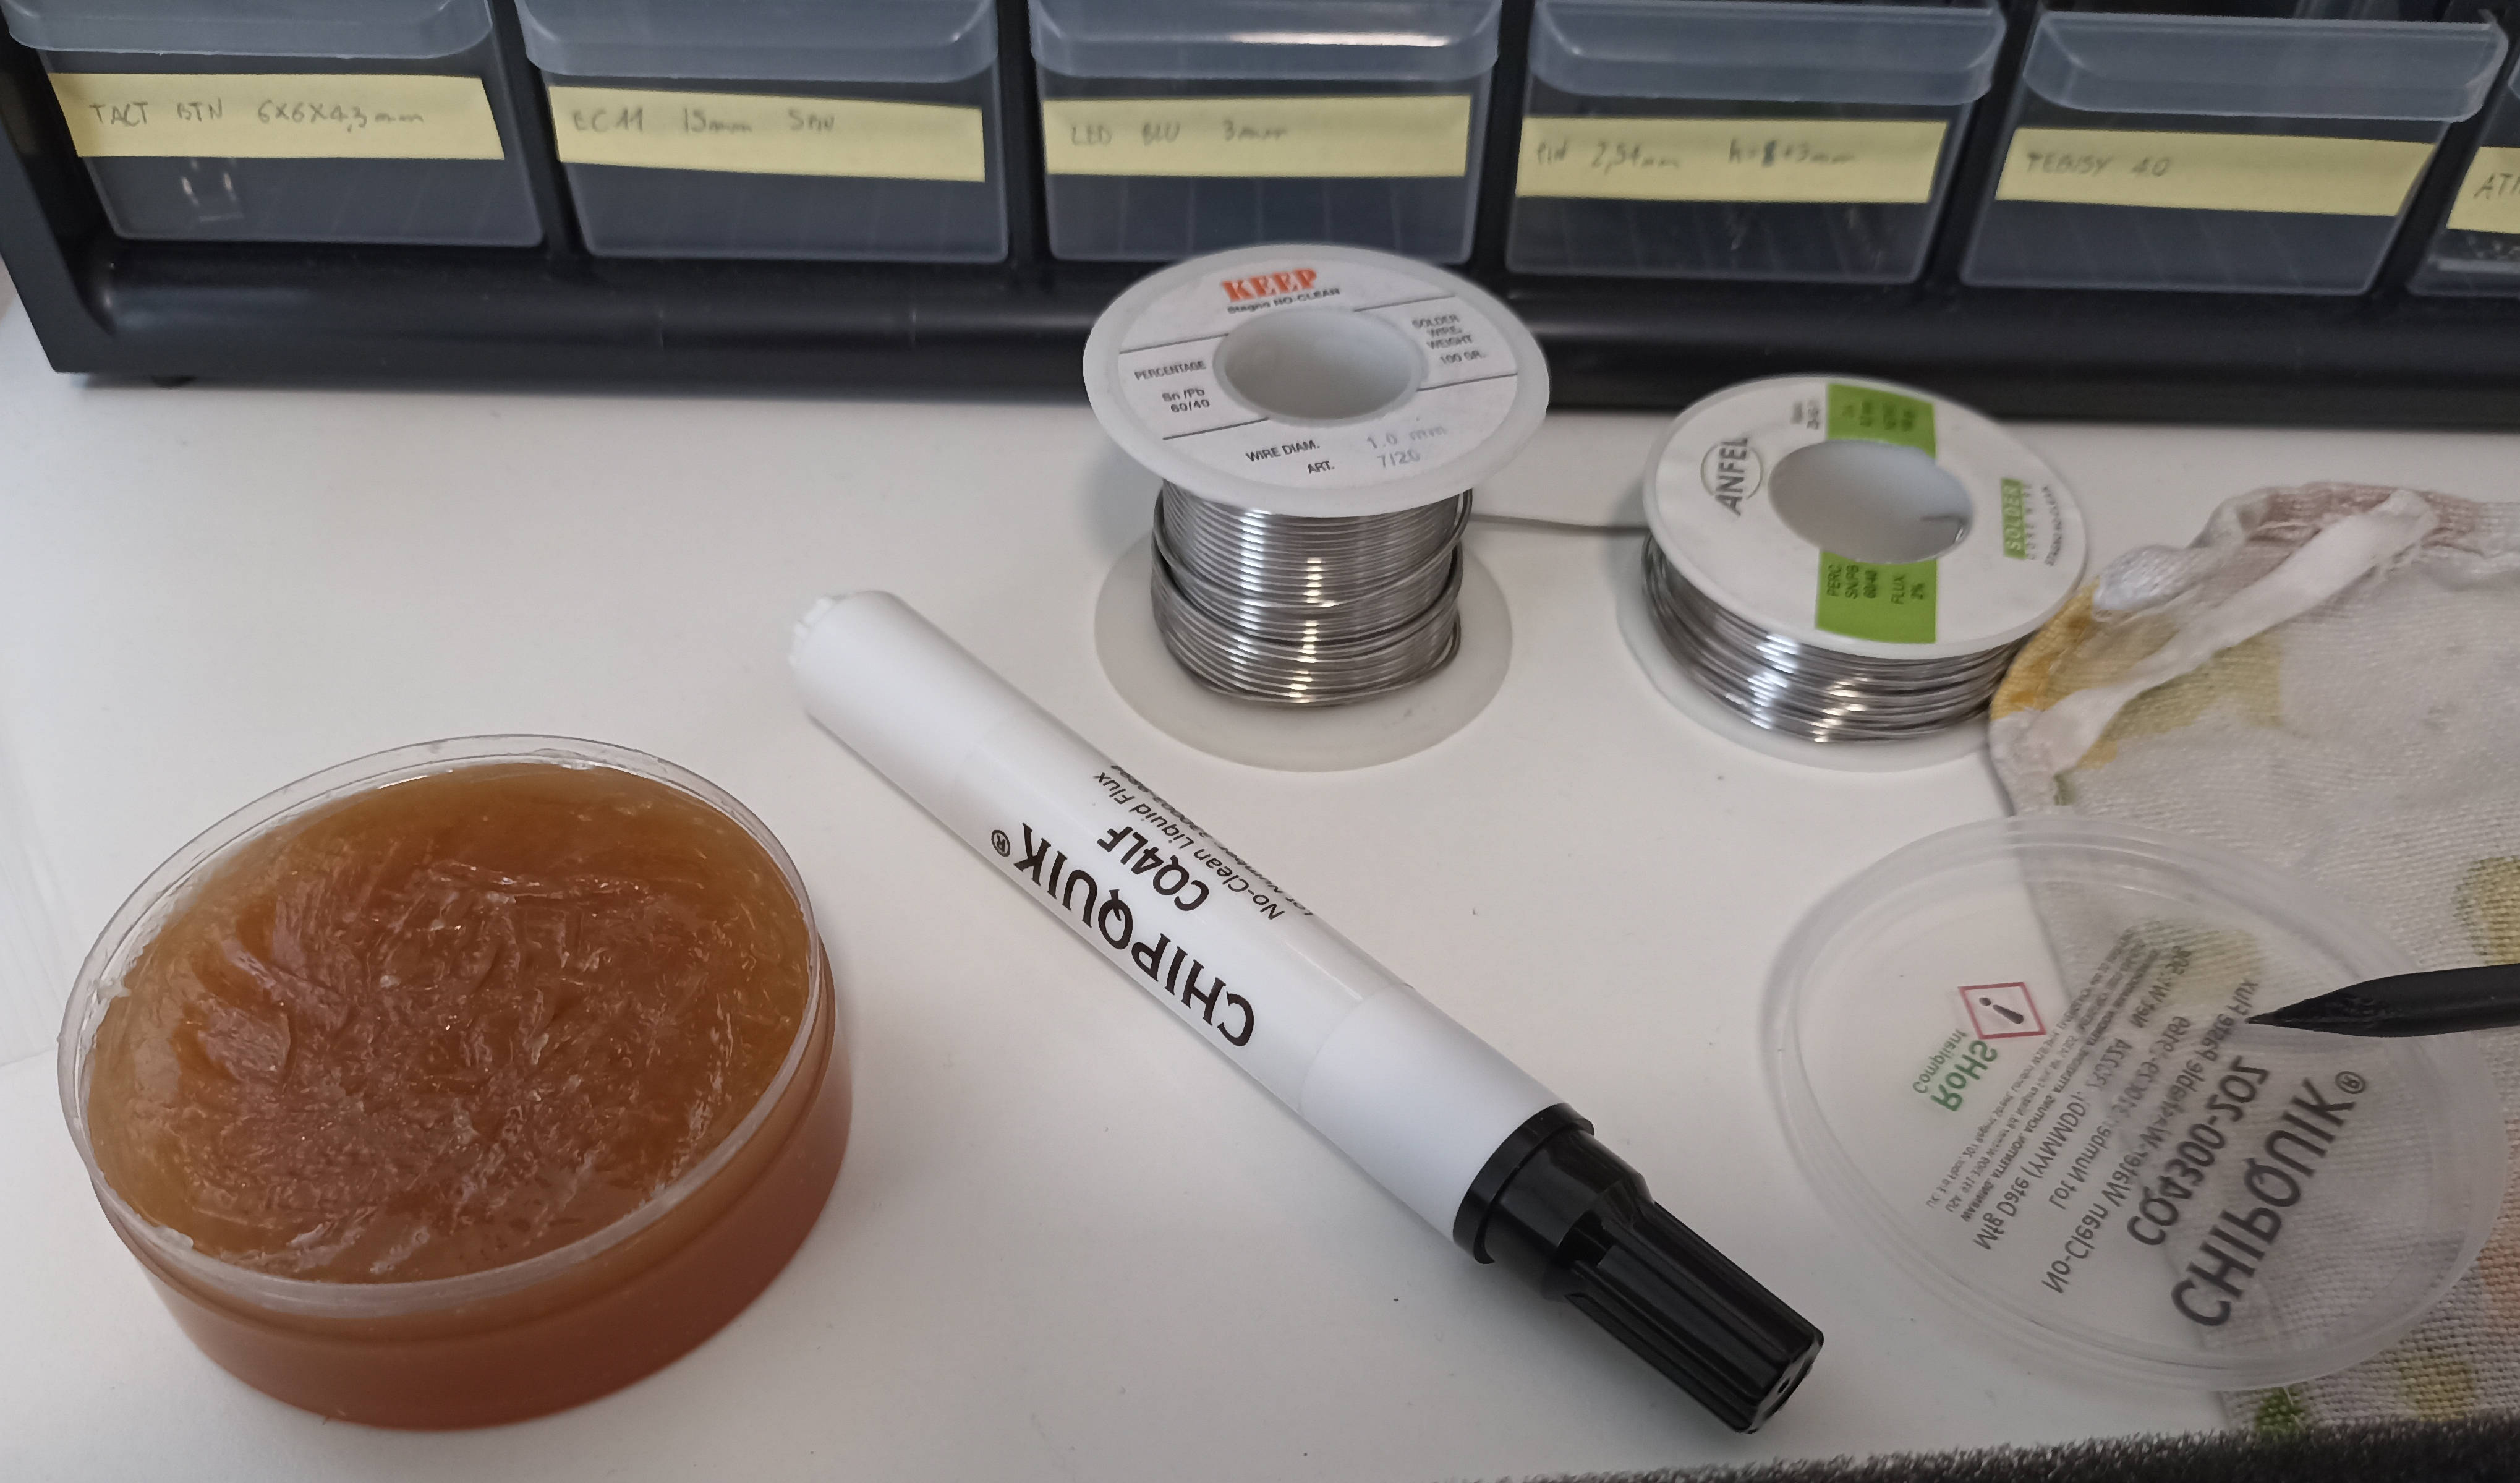
Unlike the last attempt, I found all the components available from trusted sellers. I order everything, except the screen (the most expensive part) just because, the last time, I was cautious enough to not solder it directly to the PCB, but use pin headers (more about this later). When I placed the order I decided to buy paste flux too, because I wanted to reach the minimum order quantity for free shipping. This flux was almost a compulsive buying but it was revealed to be a solder-noob saving tool! Well beyond the flux pen that I used in the previous attempt.
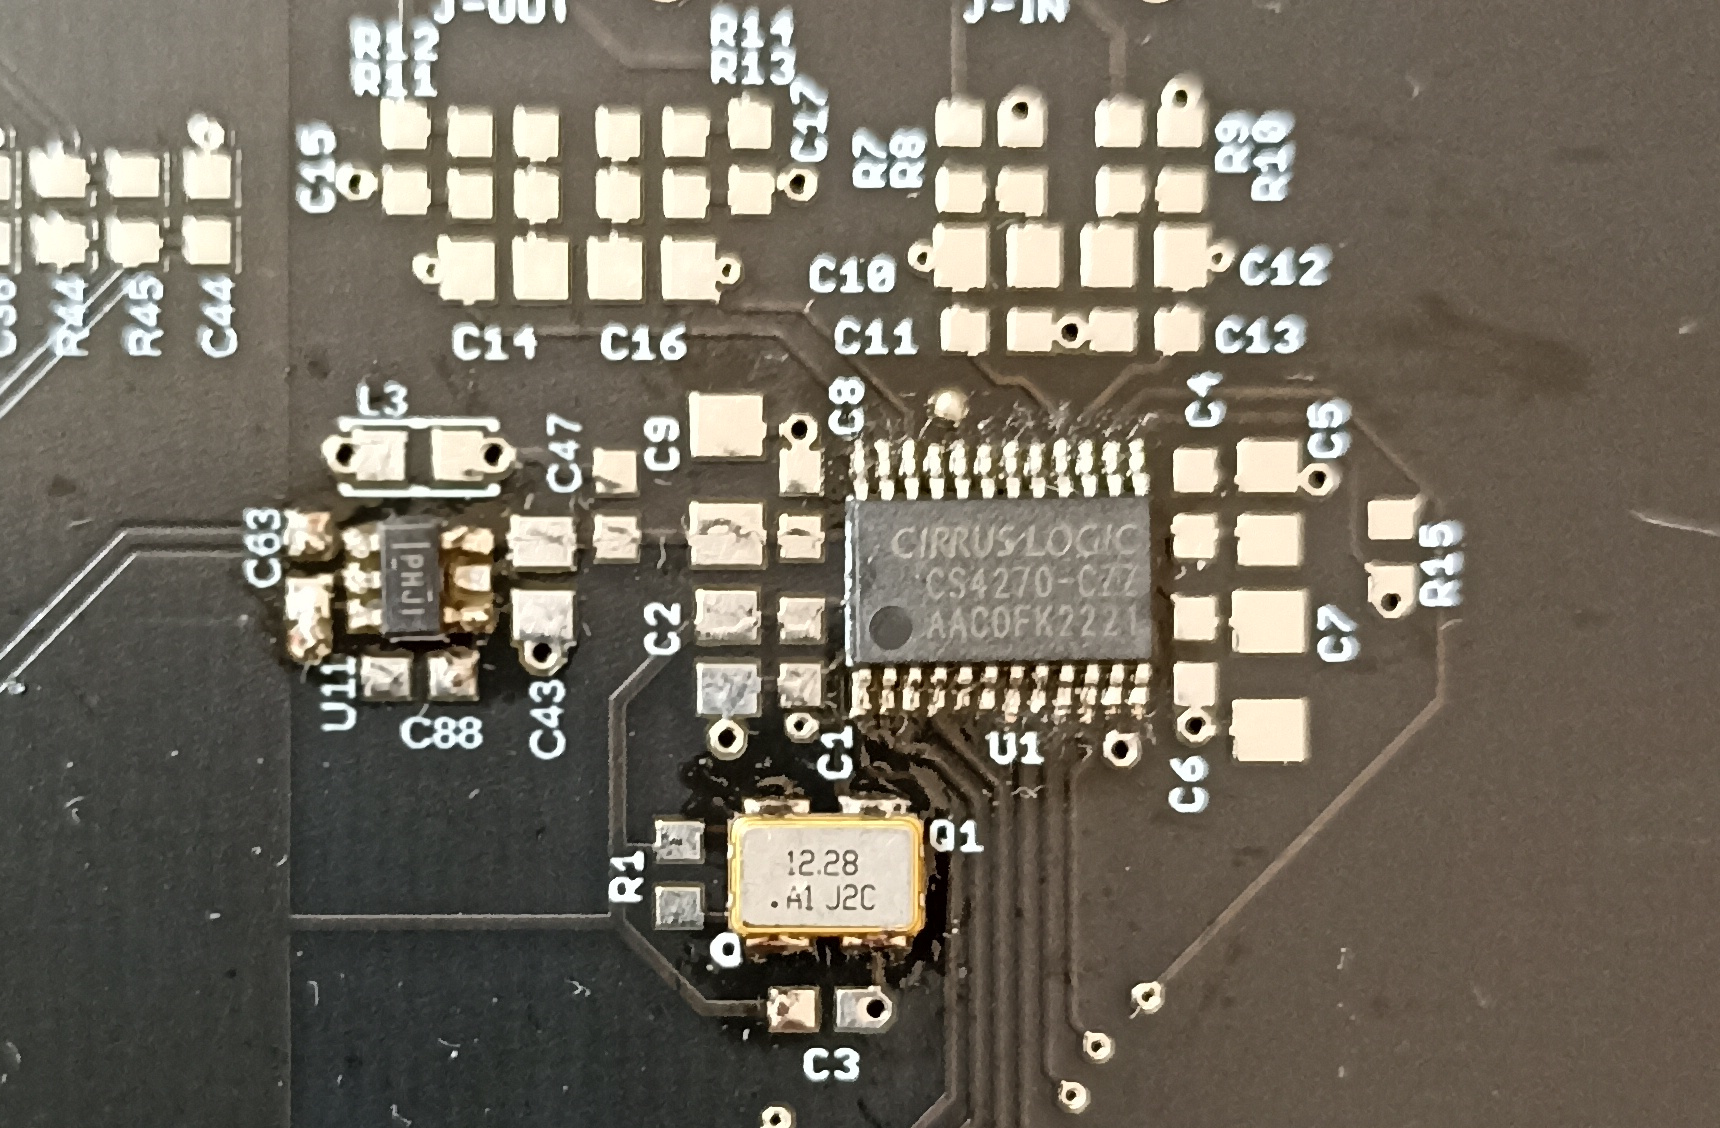
Let's begin with the build! This time I decided to start from the hardest components. The first one was my archenemy: the Cirrus Logic CS4270. I have to say that with the solder flux, it was way easier than the last time. I made it in a few minutes. After that, I soldered the crystal, and the newly added LDO voltage regulator, introduced with the review of the PCB.
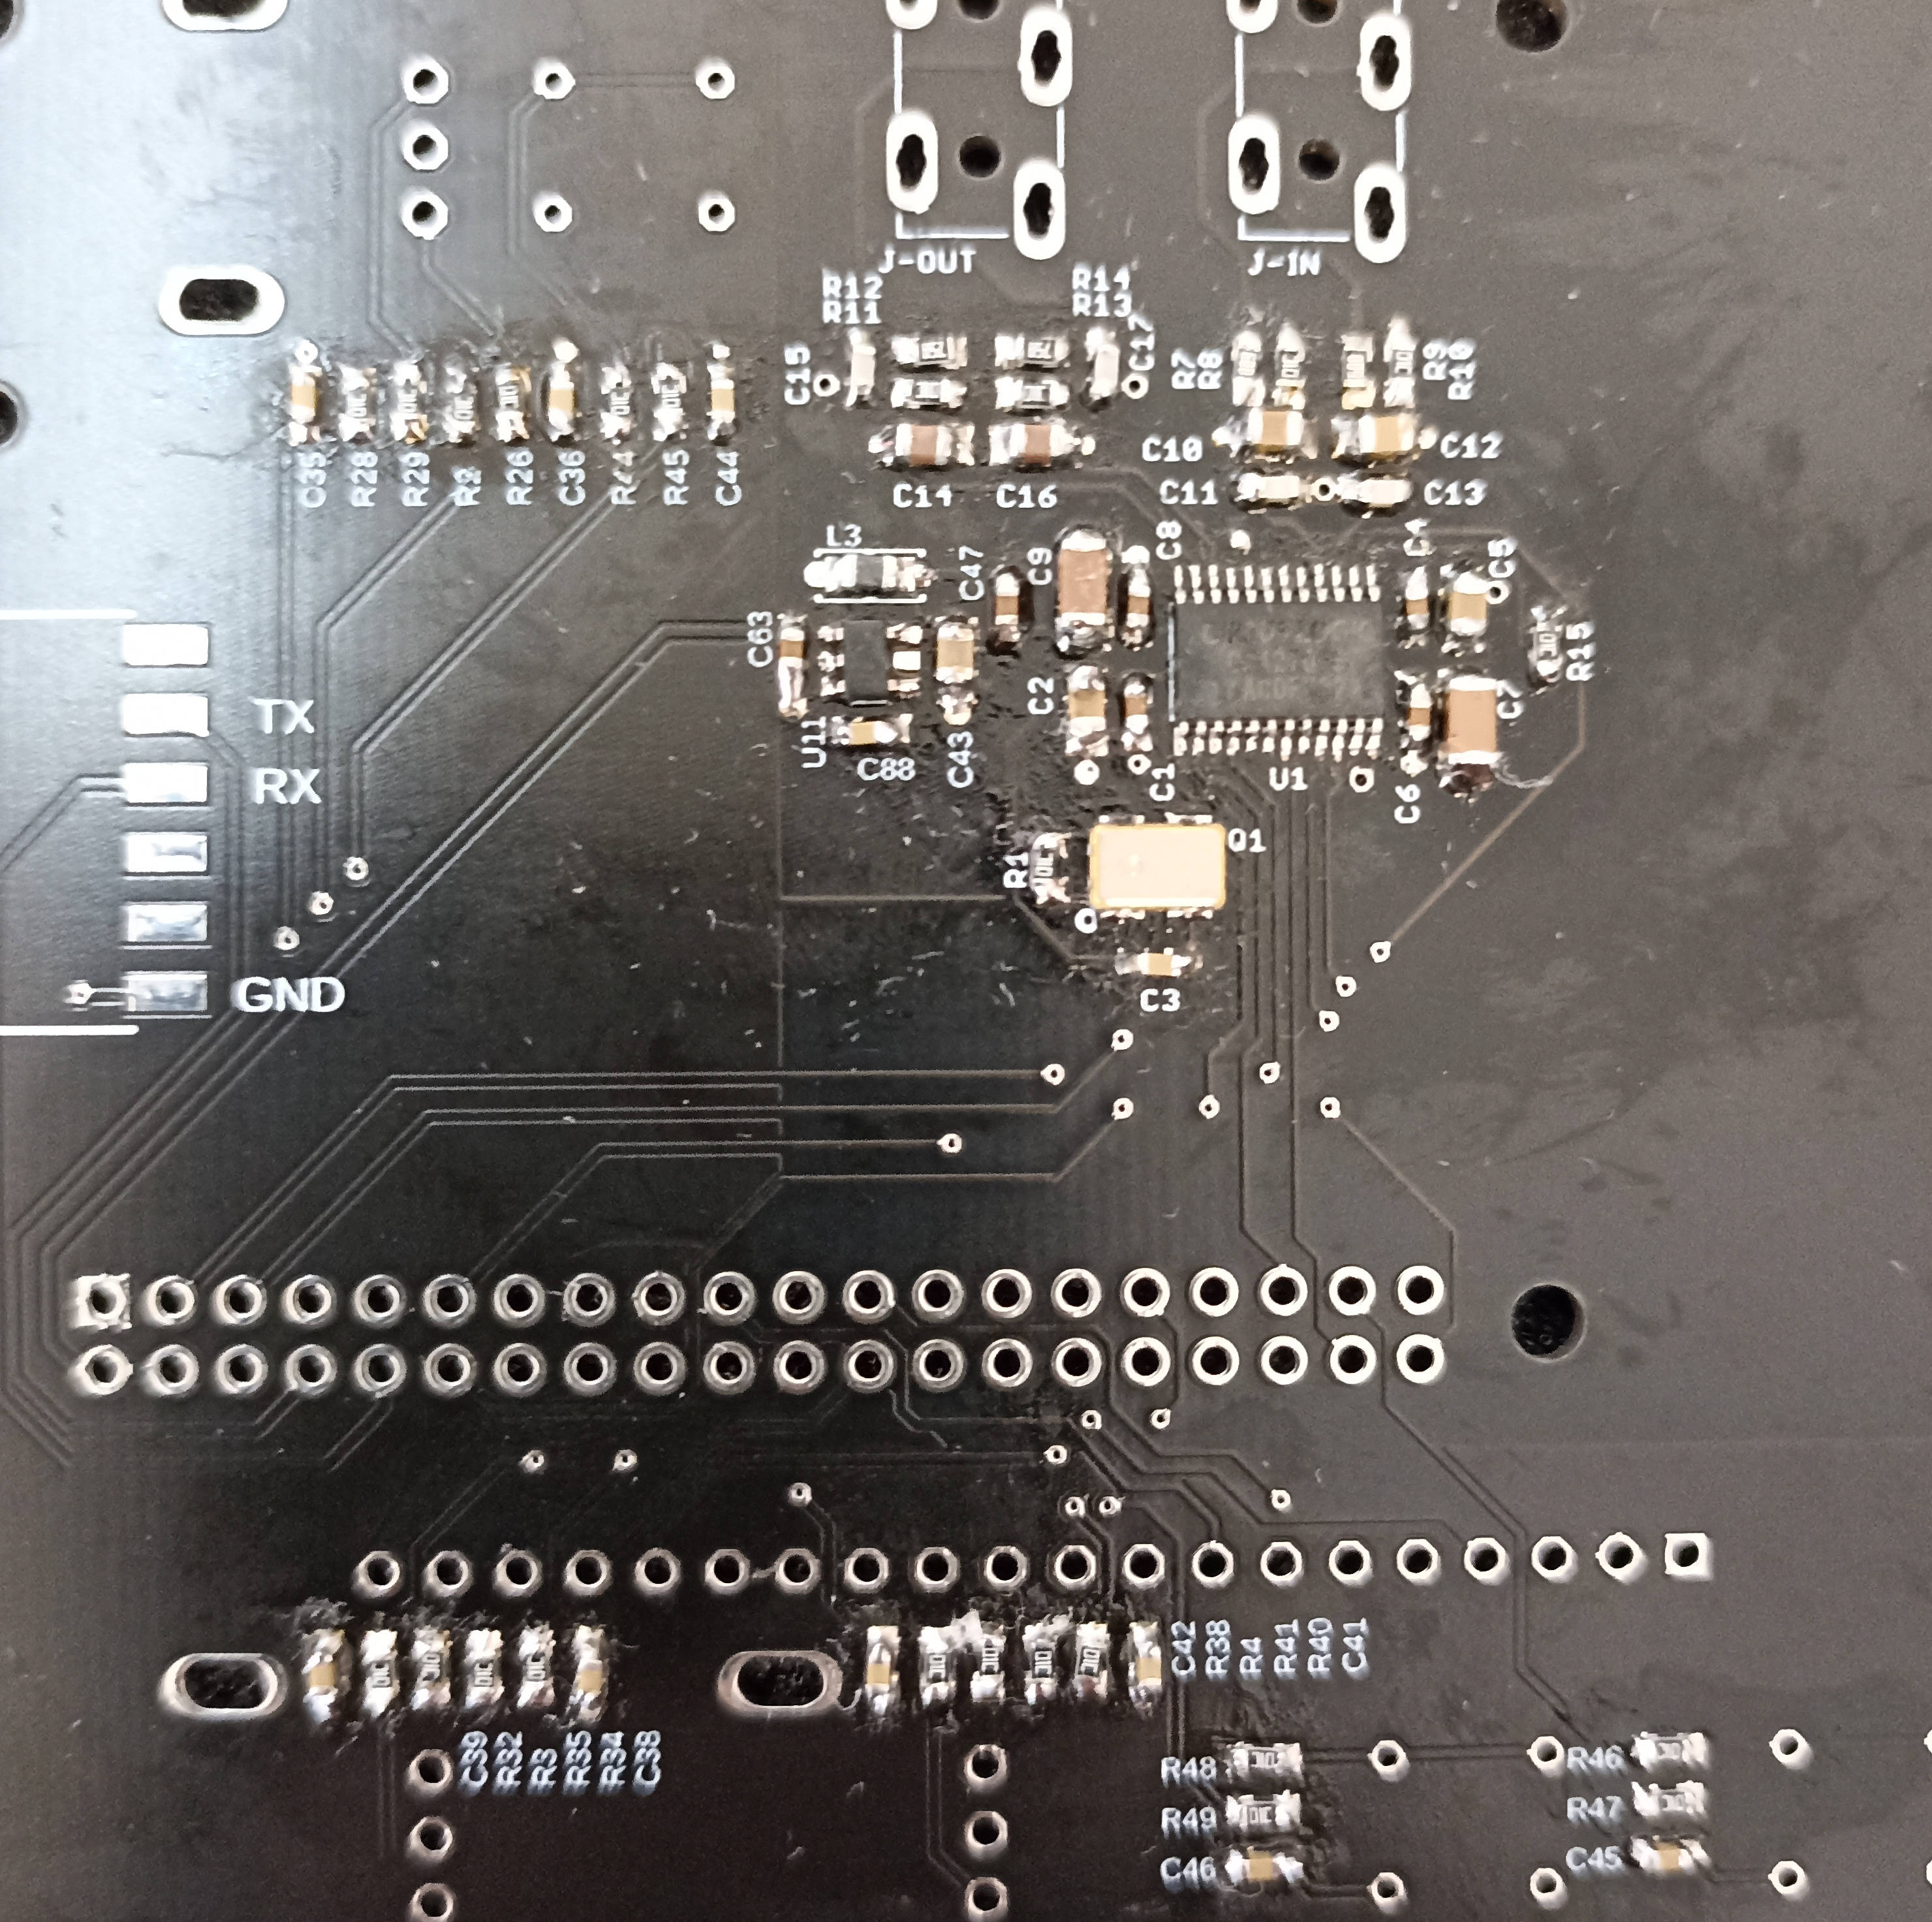
I populated all the PCB with the remaining components without too much trouble.
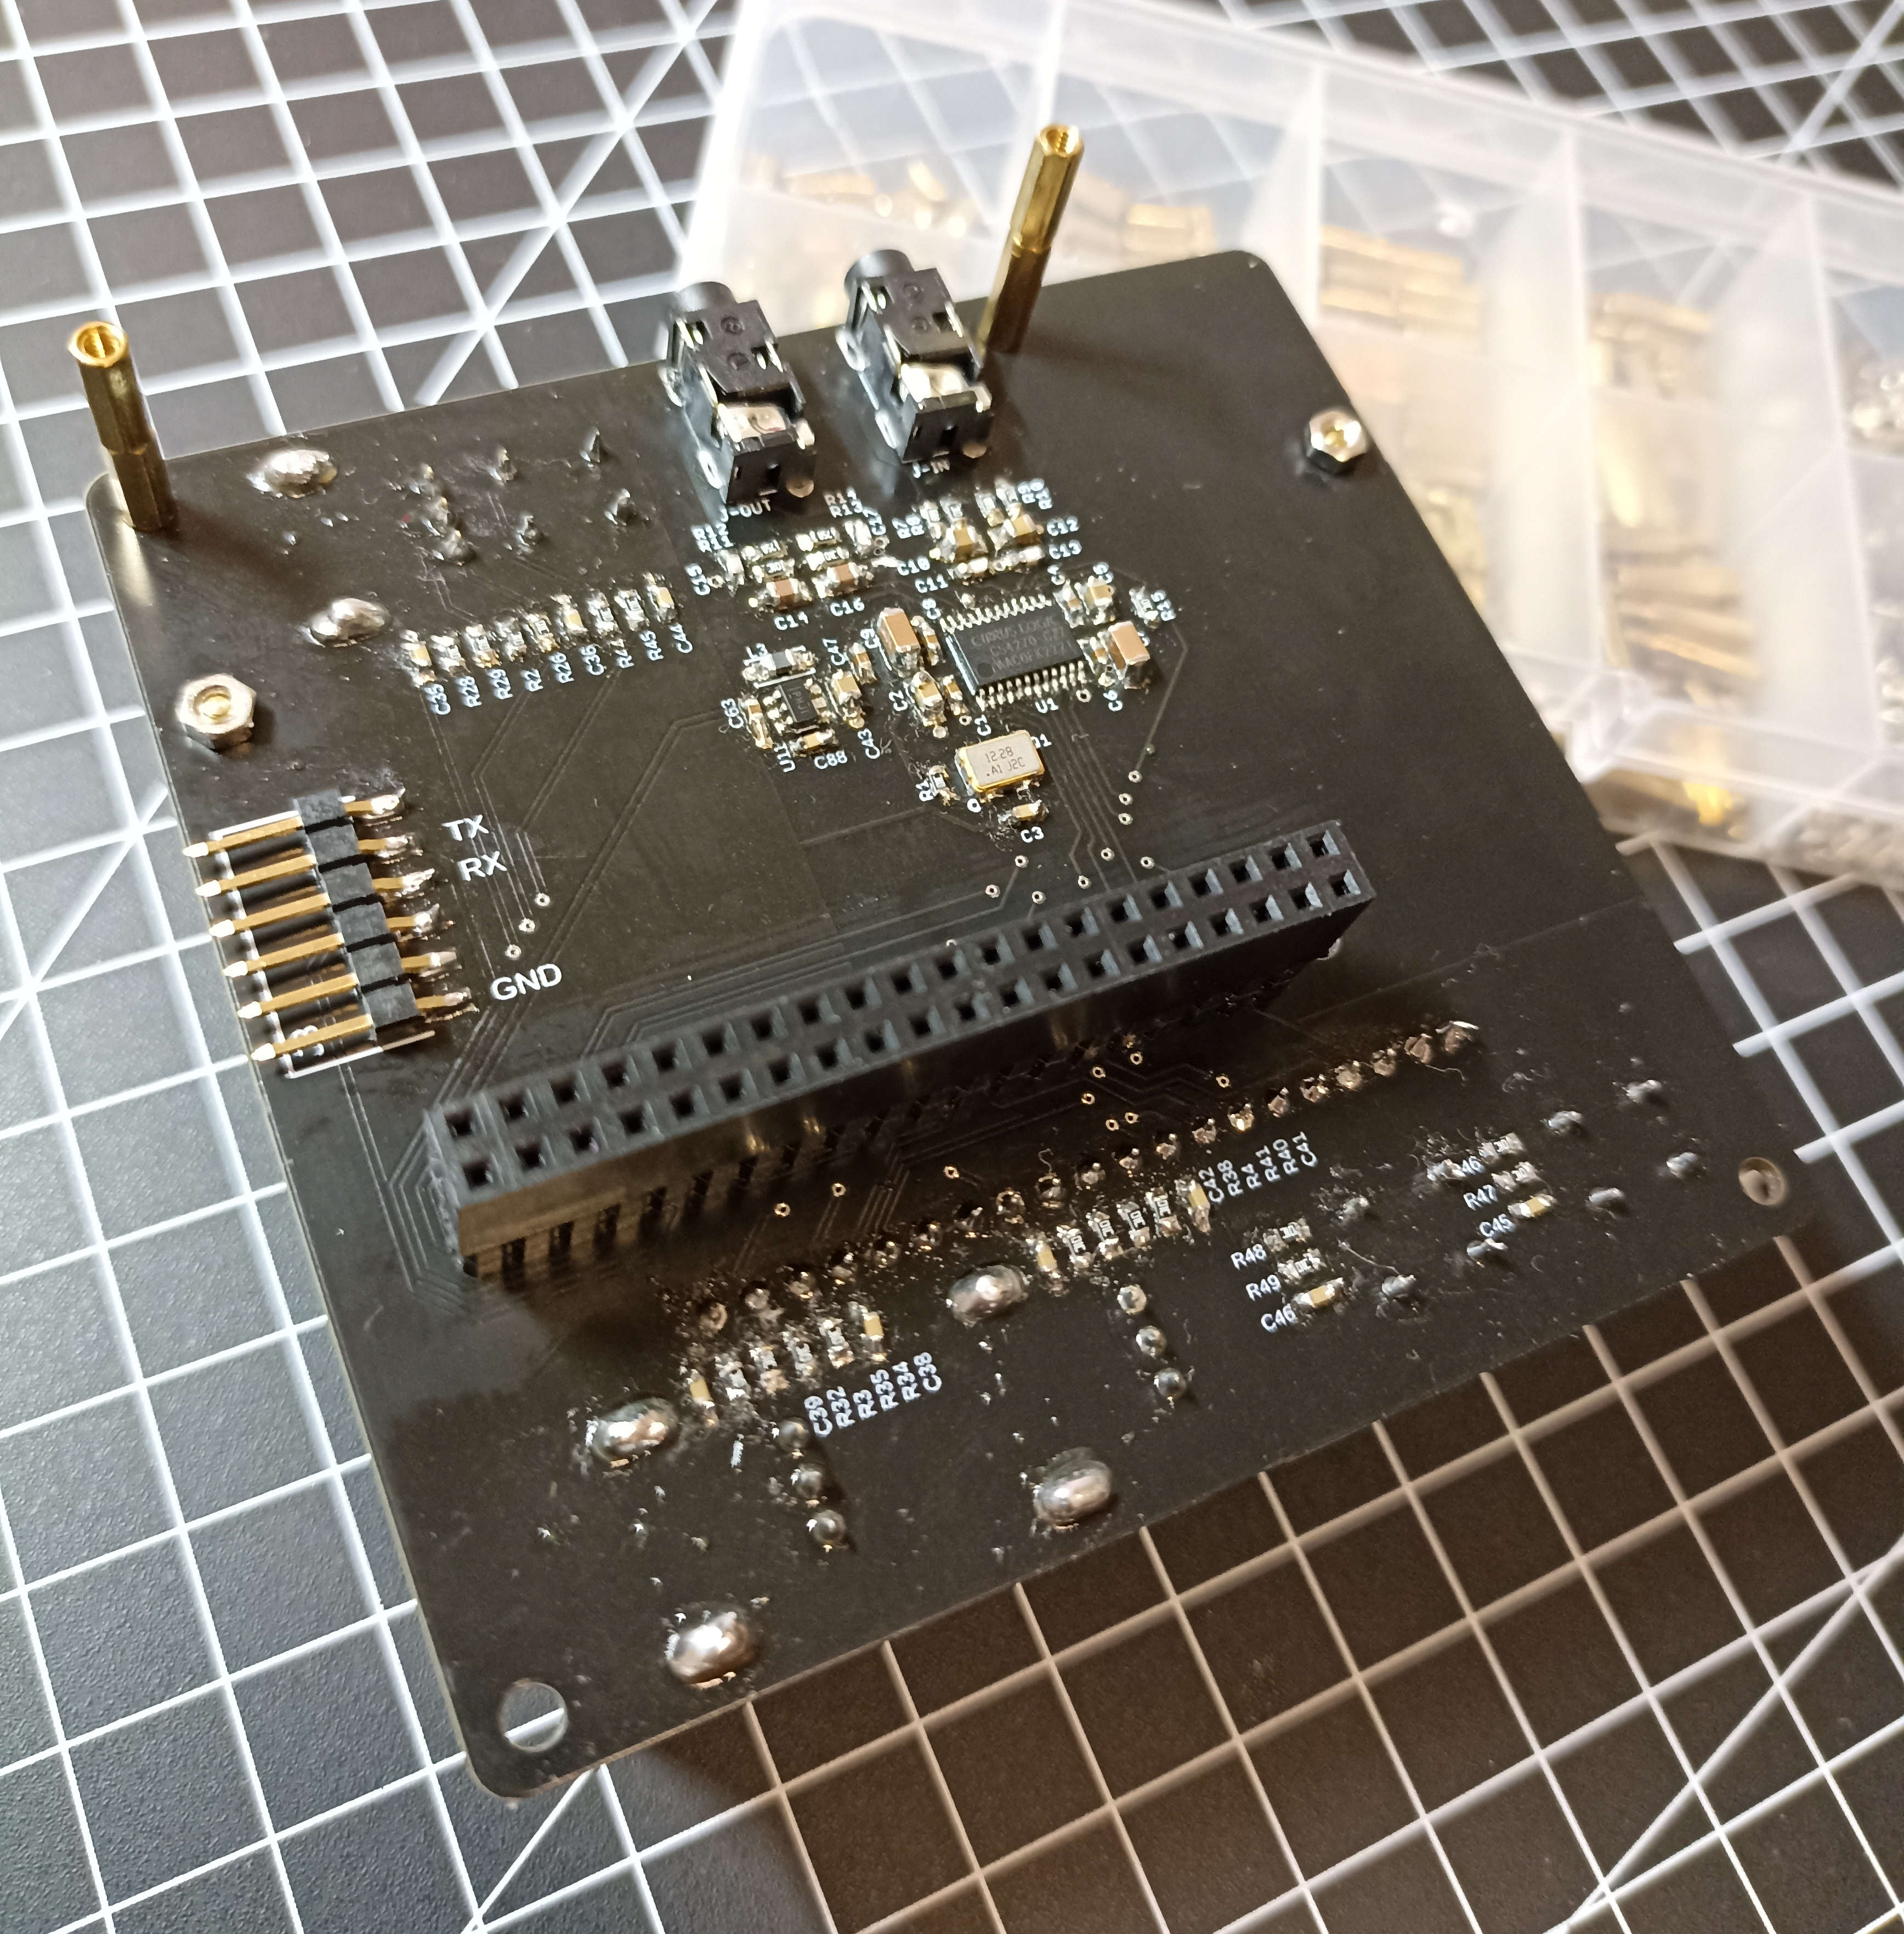
The only problem I encountered was the pin header attached to the screen. I soldered it when I built the first norns shield and I used the premium Preci-Dip header type (Mill-Max alike), but I made a mistake: I didn't notice that the male-male header it's not symmetric! On one side the pins are thicker than the other one. I should have soldered the thicker ones to the screen PCB.
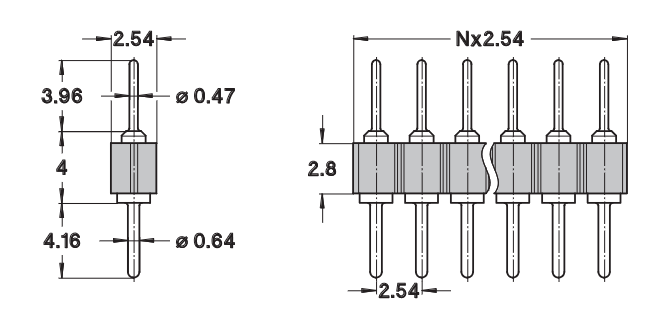
I am underlining this because it was very difficult to slide the wrong ones inside the male-female header soldered to the main PCB and I was afraid to break the board or the pins (as already happened the first time but I didn't figure out the cause). A deep breath, a hard push with my eyes closed, and I made it without damaging anything.
I followed the instructions and flashed the microSD. I connect the Raspberry Pi and ... it's *awake*! (pun intended LOL)
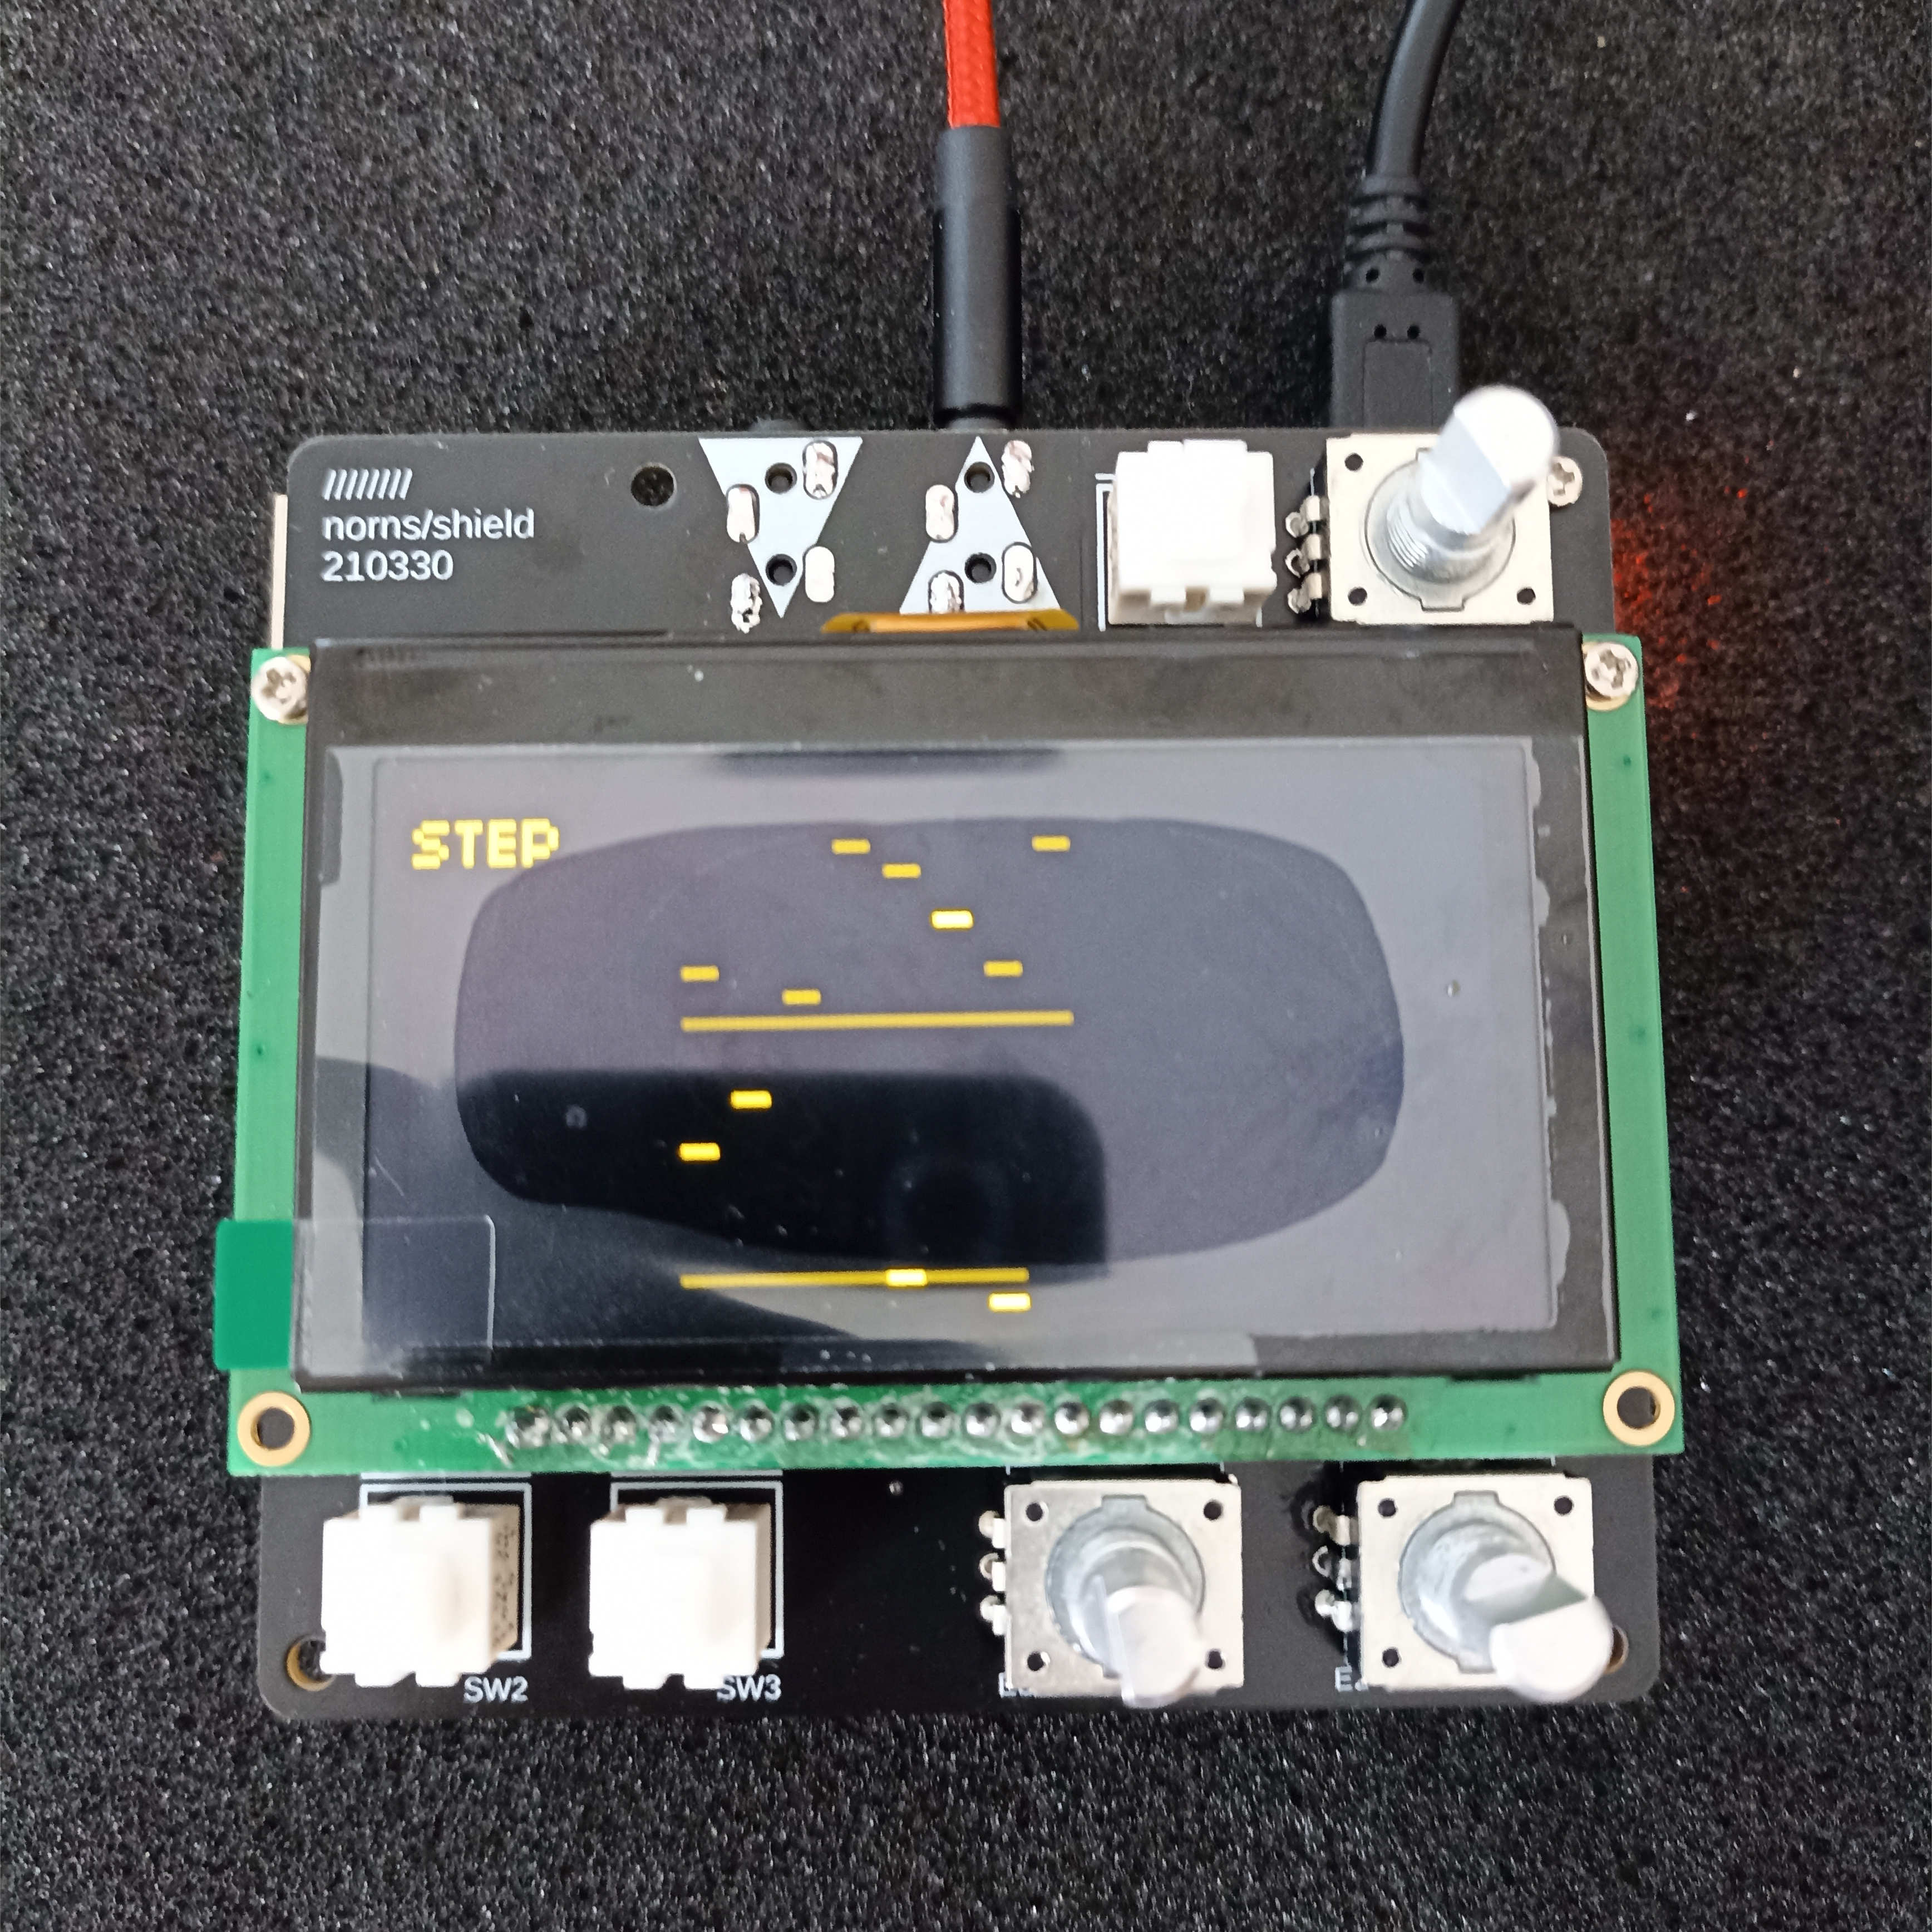
Everything works flawlessly! Yay!
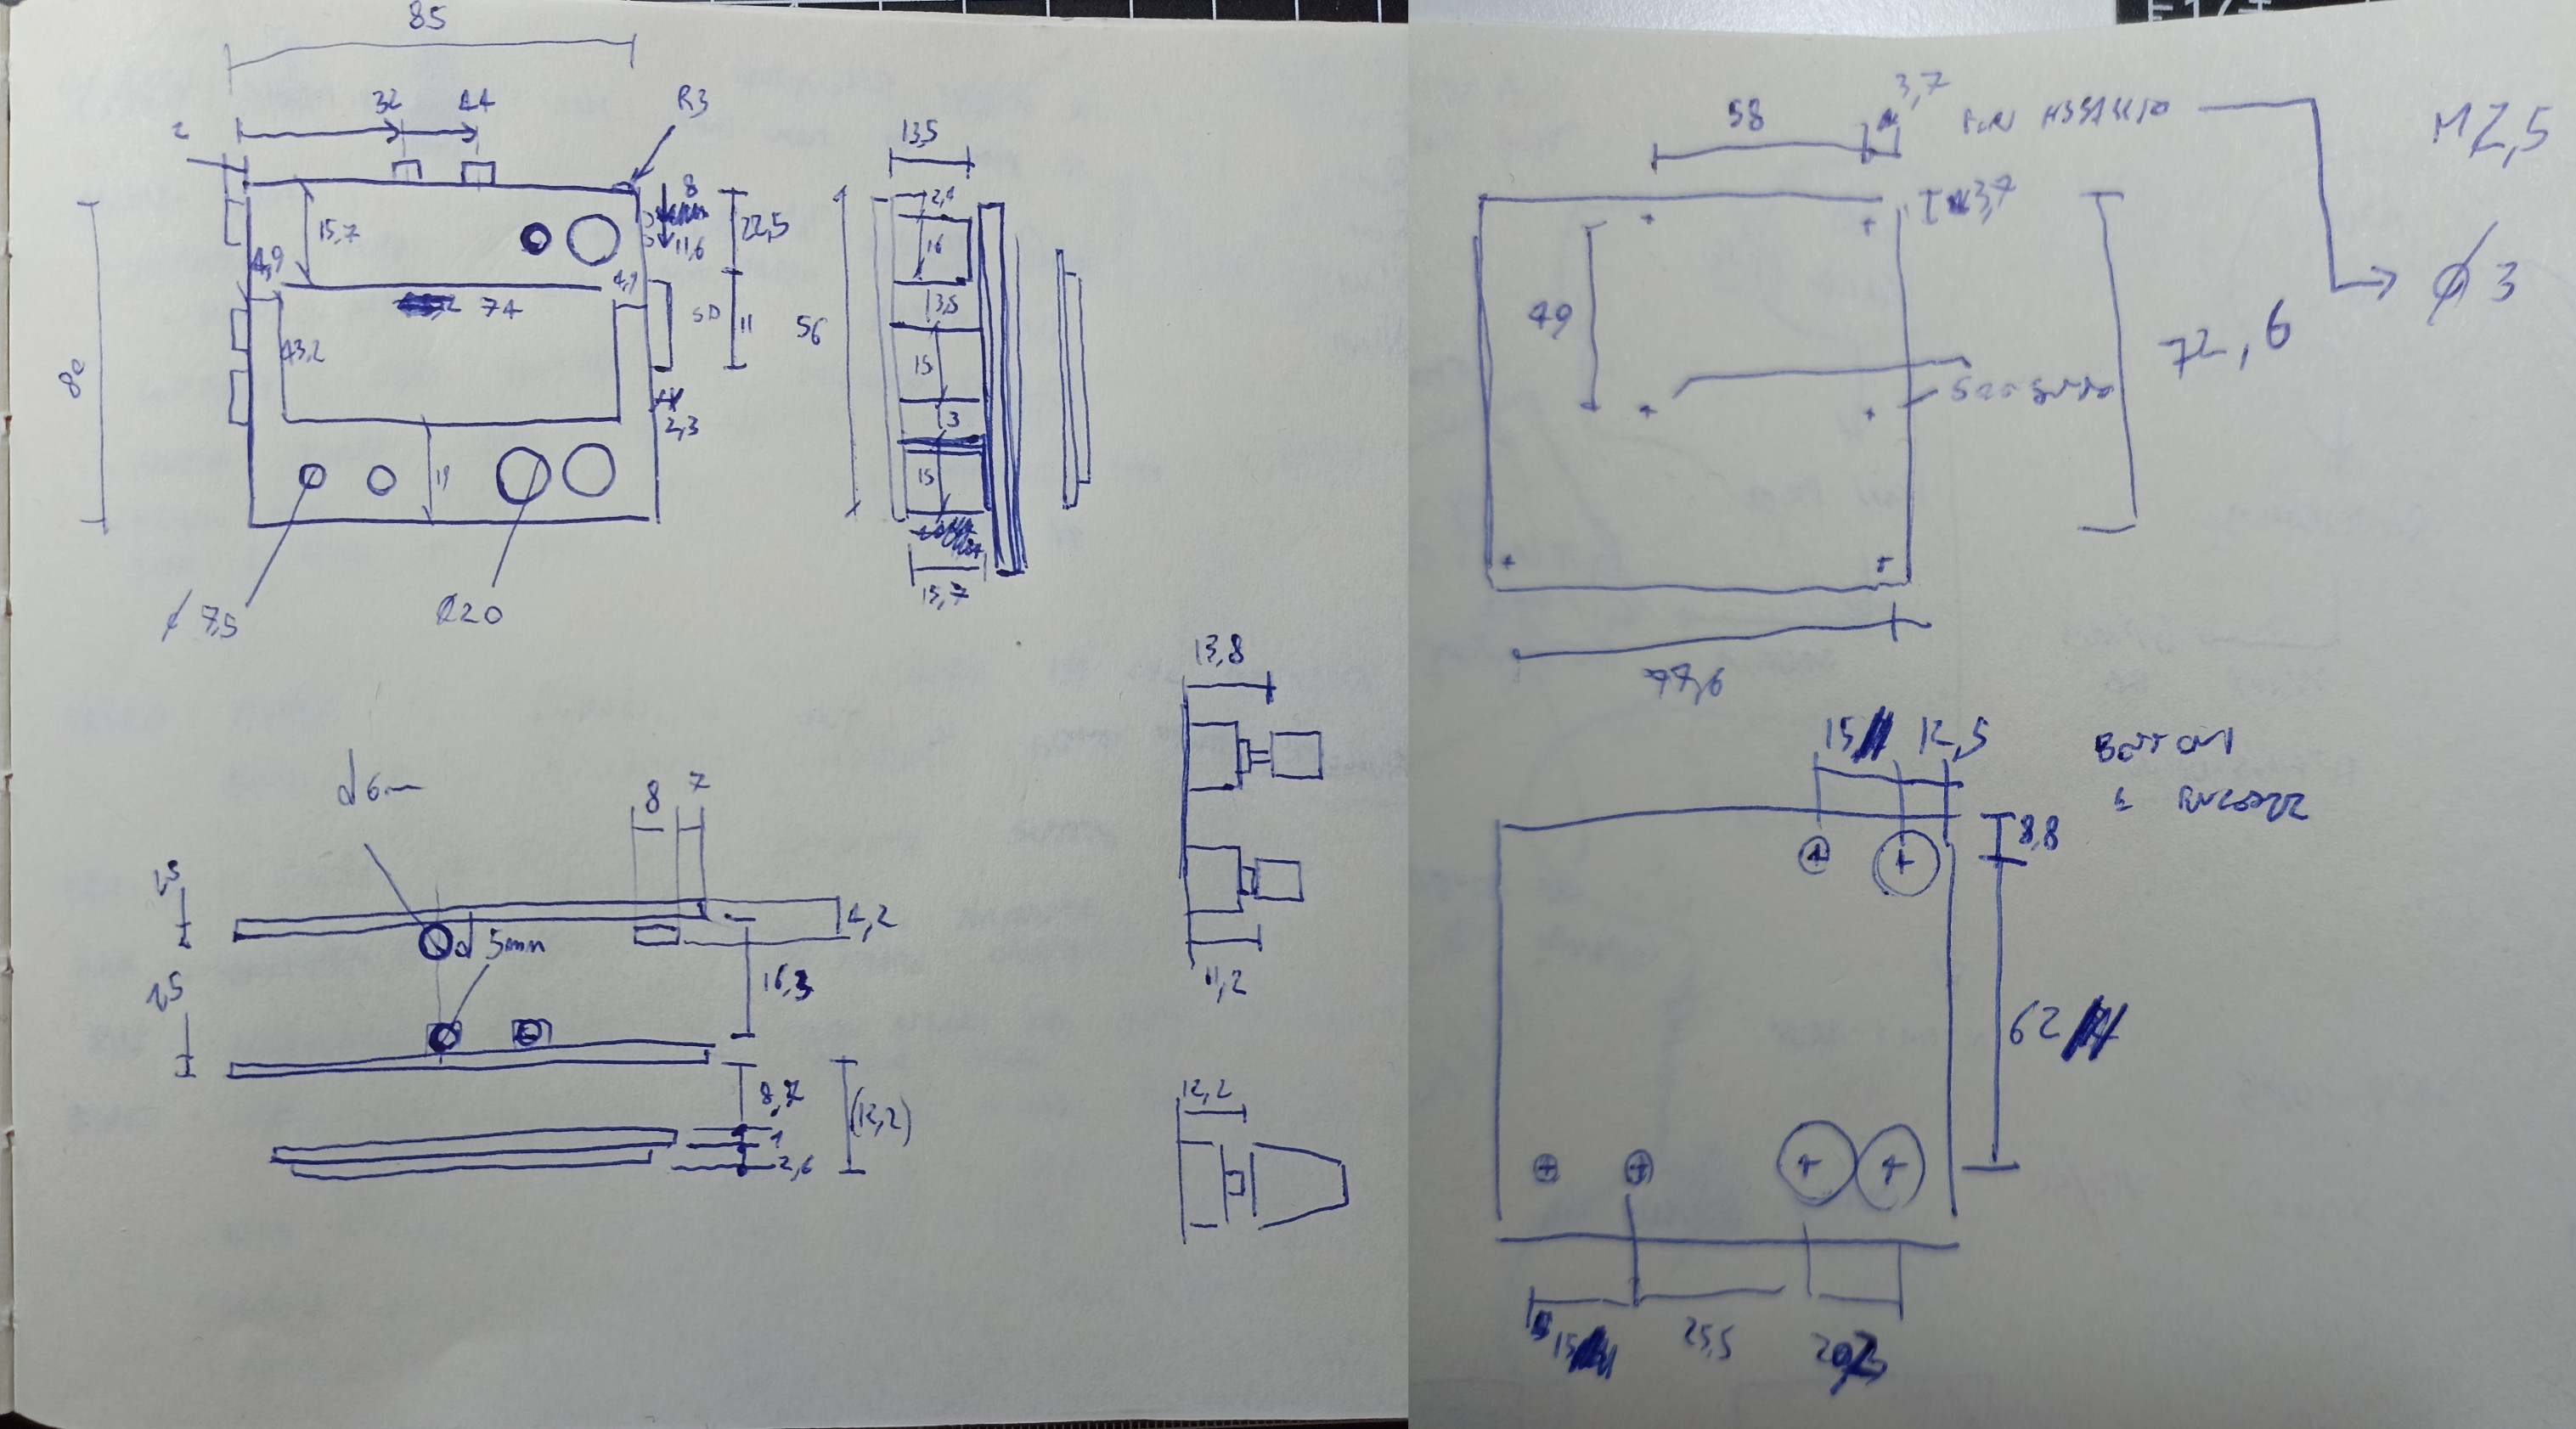
Now it's time to make a case for the little boy. The first thing I did was take my caliper and measure the thing.
After that, I searched on the norns forum for some inspiration and I found
this thread with a lot of beautiful cases.
The first one I designed was made with a 3 mm acrylic laser cut sheet similar to
the plywood one made by andrew.
I asked some local businesses for a quotation to produce it. Only one of them was kind enough to answer me
(I know, I am a private asking for a one-of-a-type production. It's more trouble than earnings for a company to accept this
kind of request), but it was over the budget.
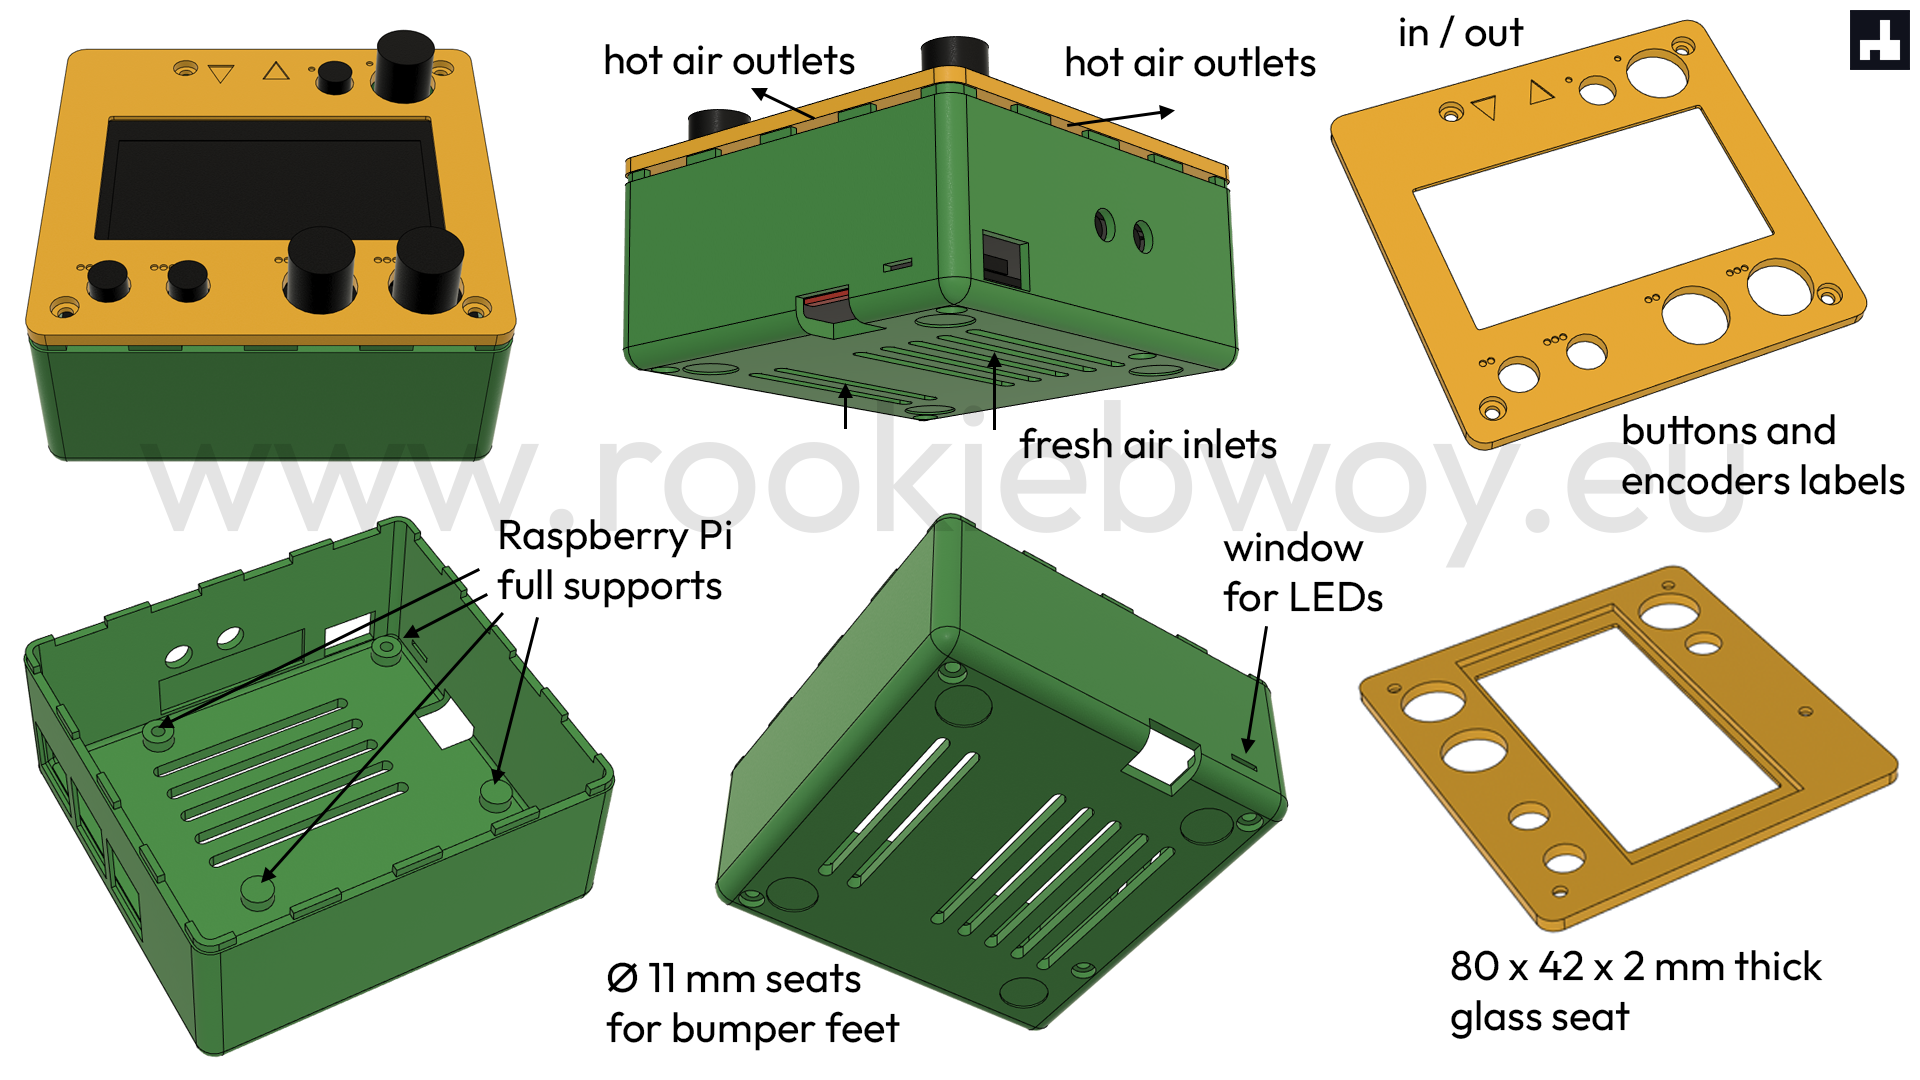
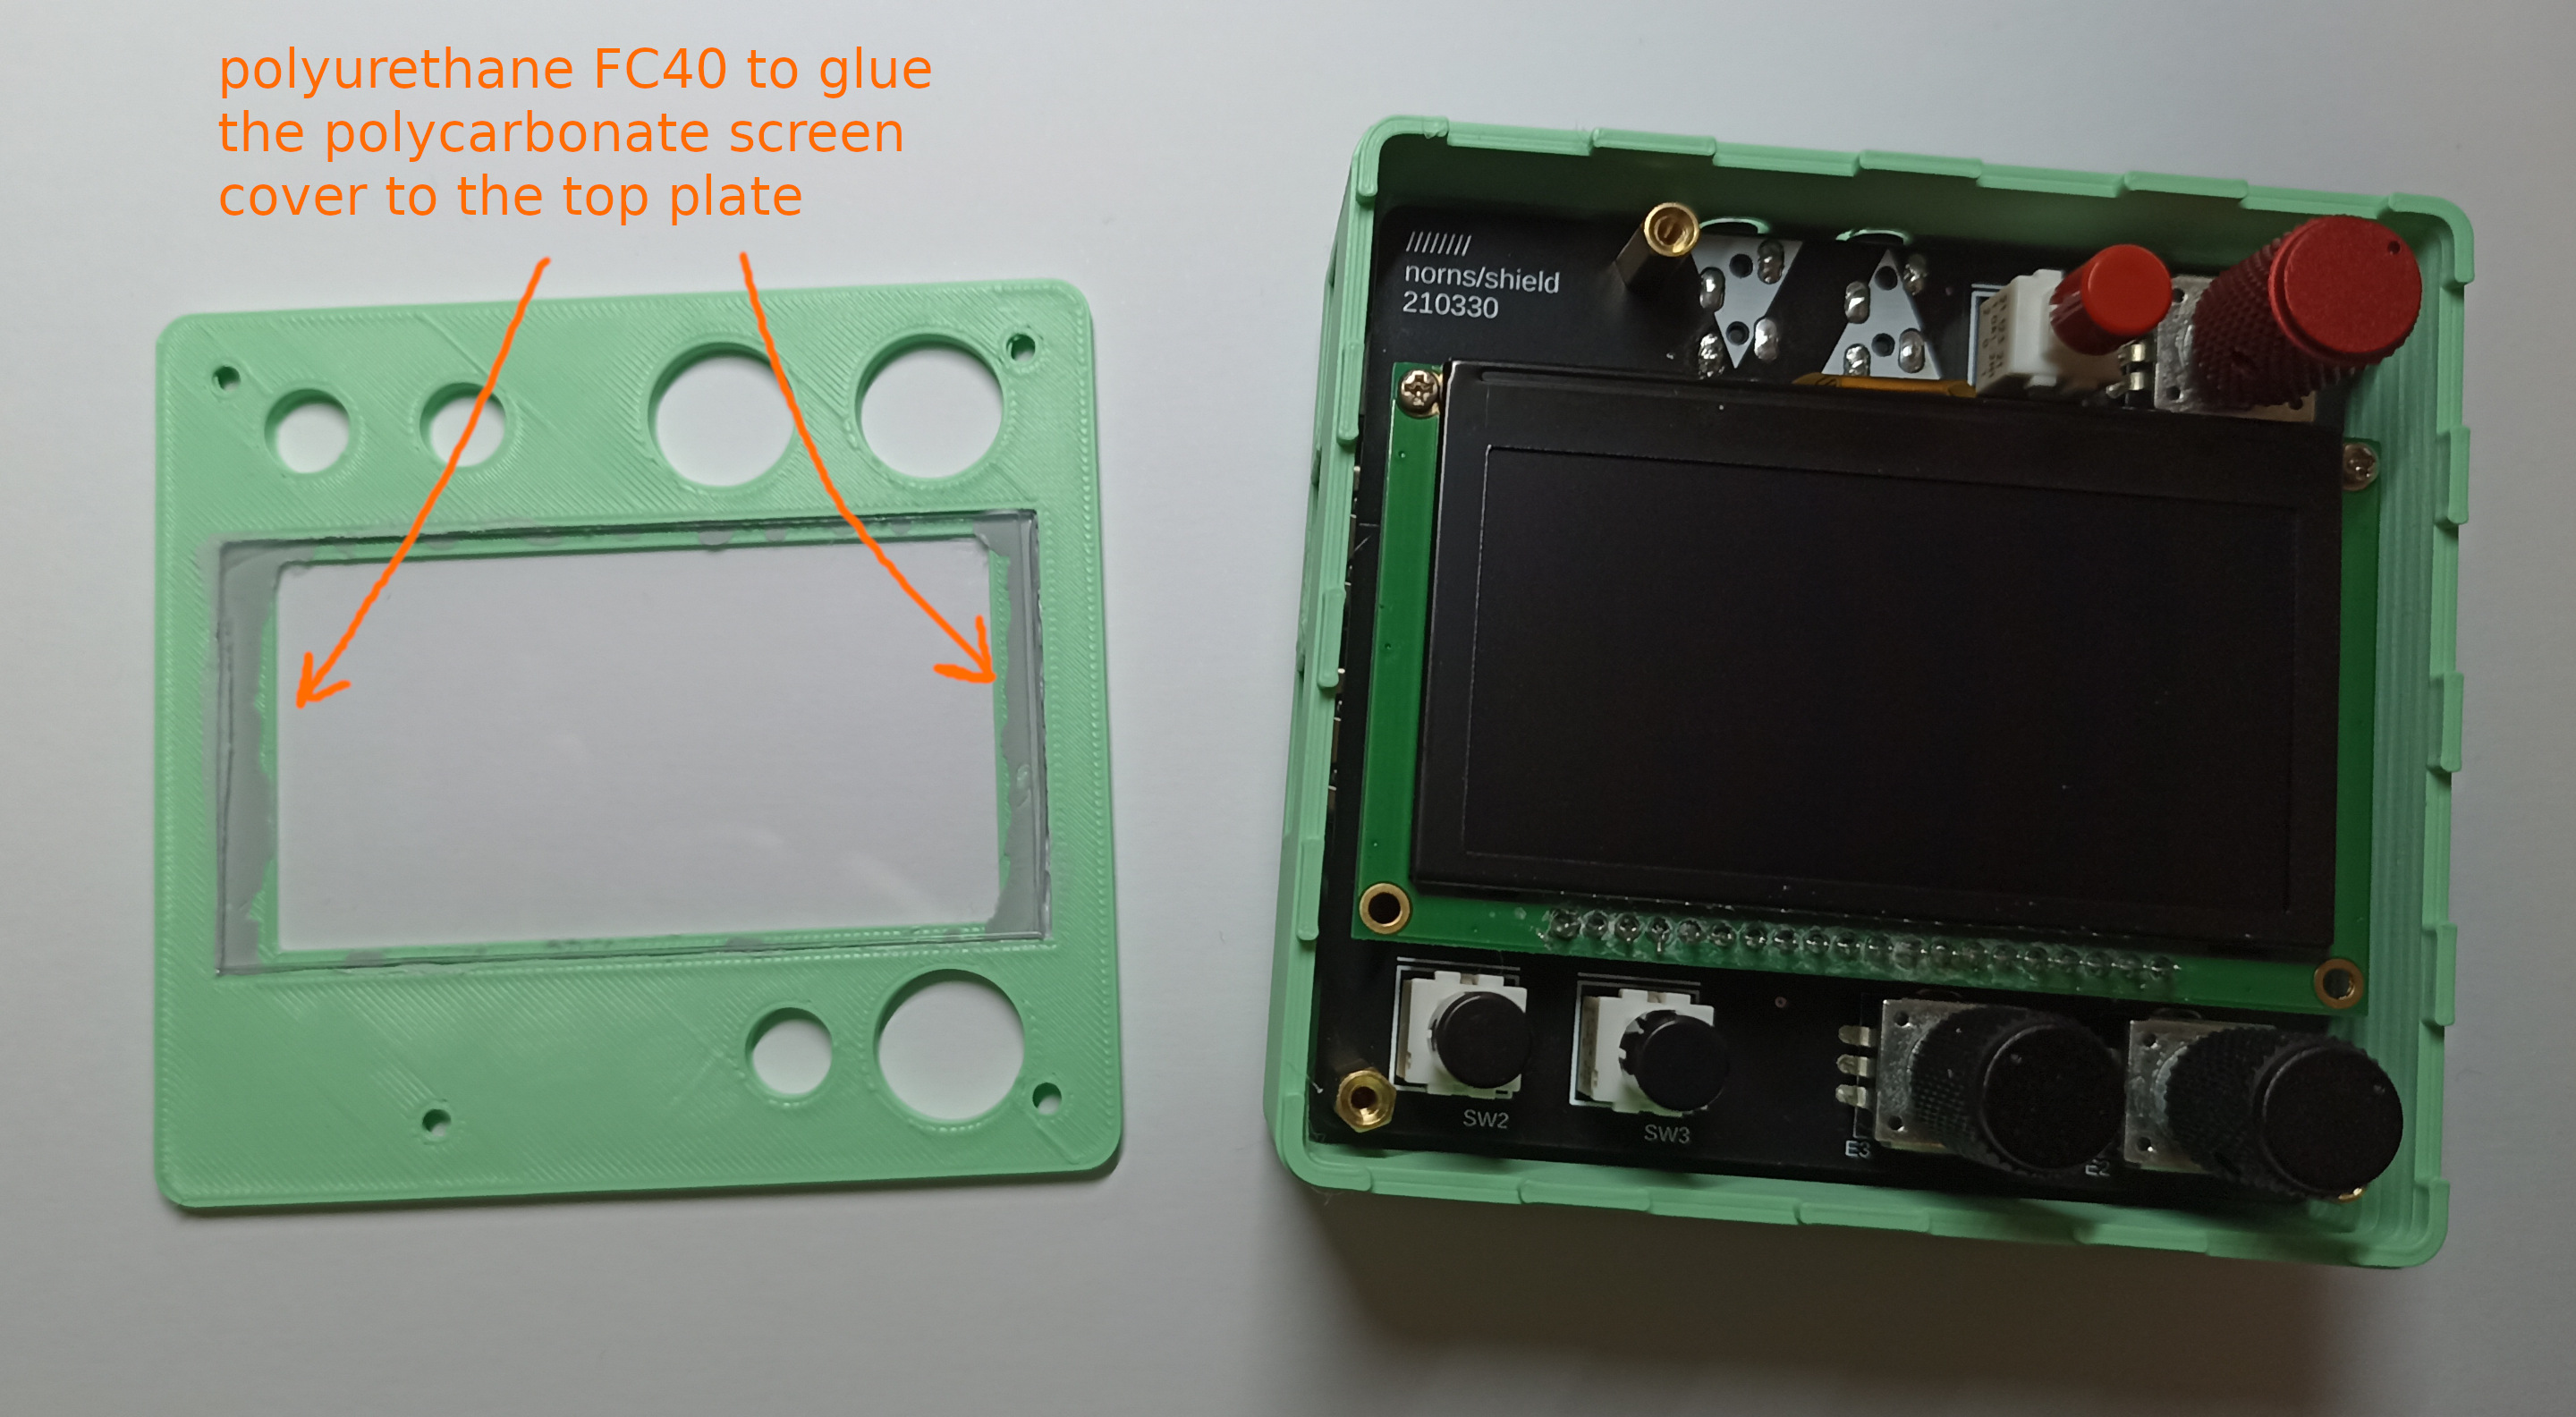
So I redo the drawings to make a 3D printable version with a cutout on top for an acrylic square to glue underneath and protect the screen.
This one takes inspiration from the one designed by JHC
and the CarlosUnch one for the buttons/encoders labeling idea.
I don't have a 3D printer, so I was about to ask a favor to some friends to print this for me...
but I decided that this was the chance to buy my first 3D printer! More about this in the next post, I promise.
(The post is online now!)
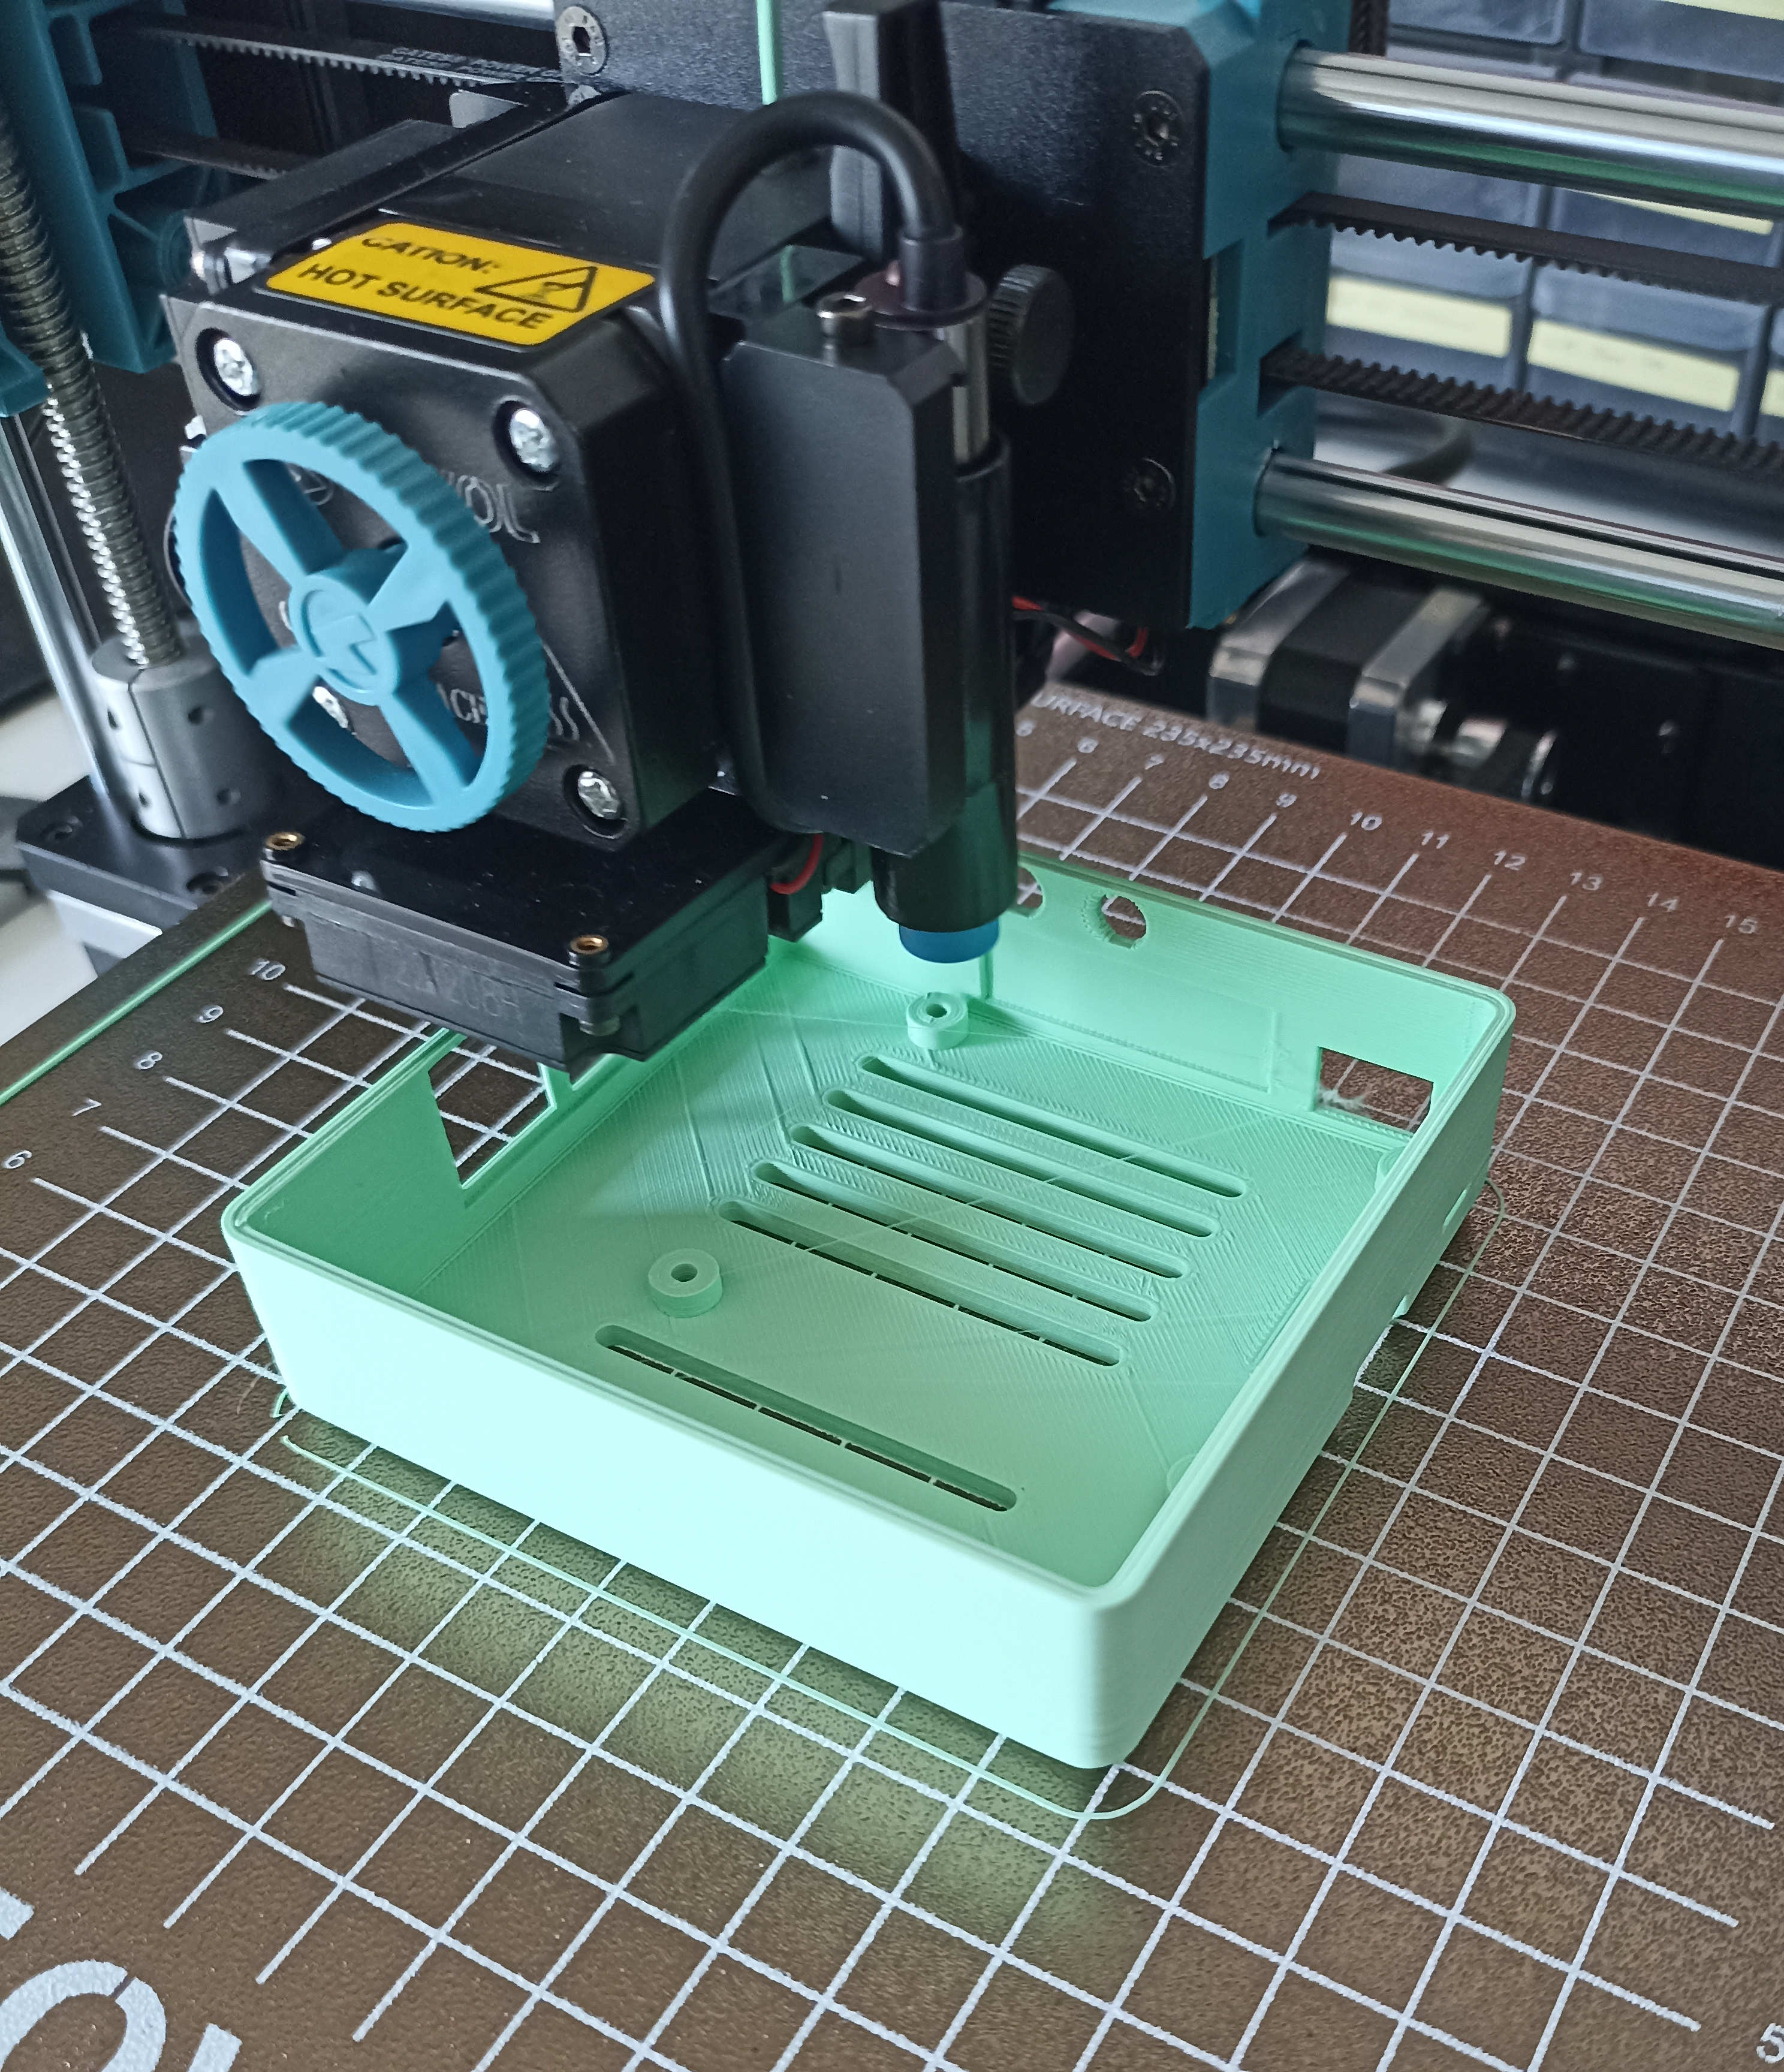
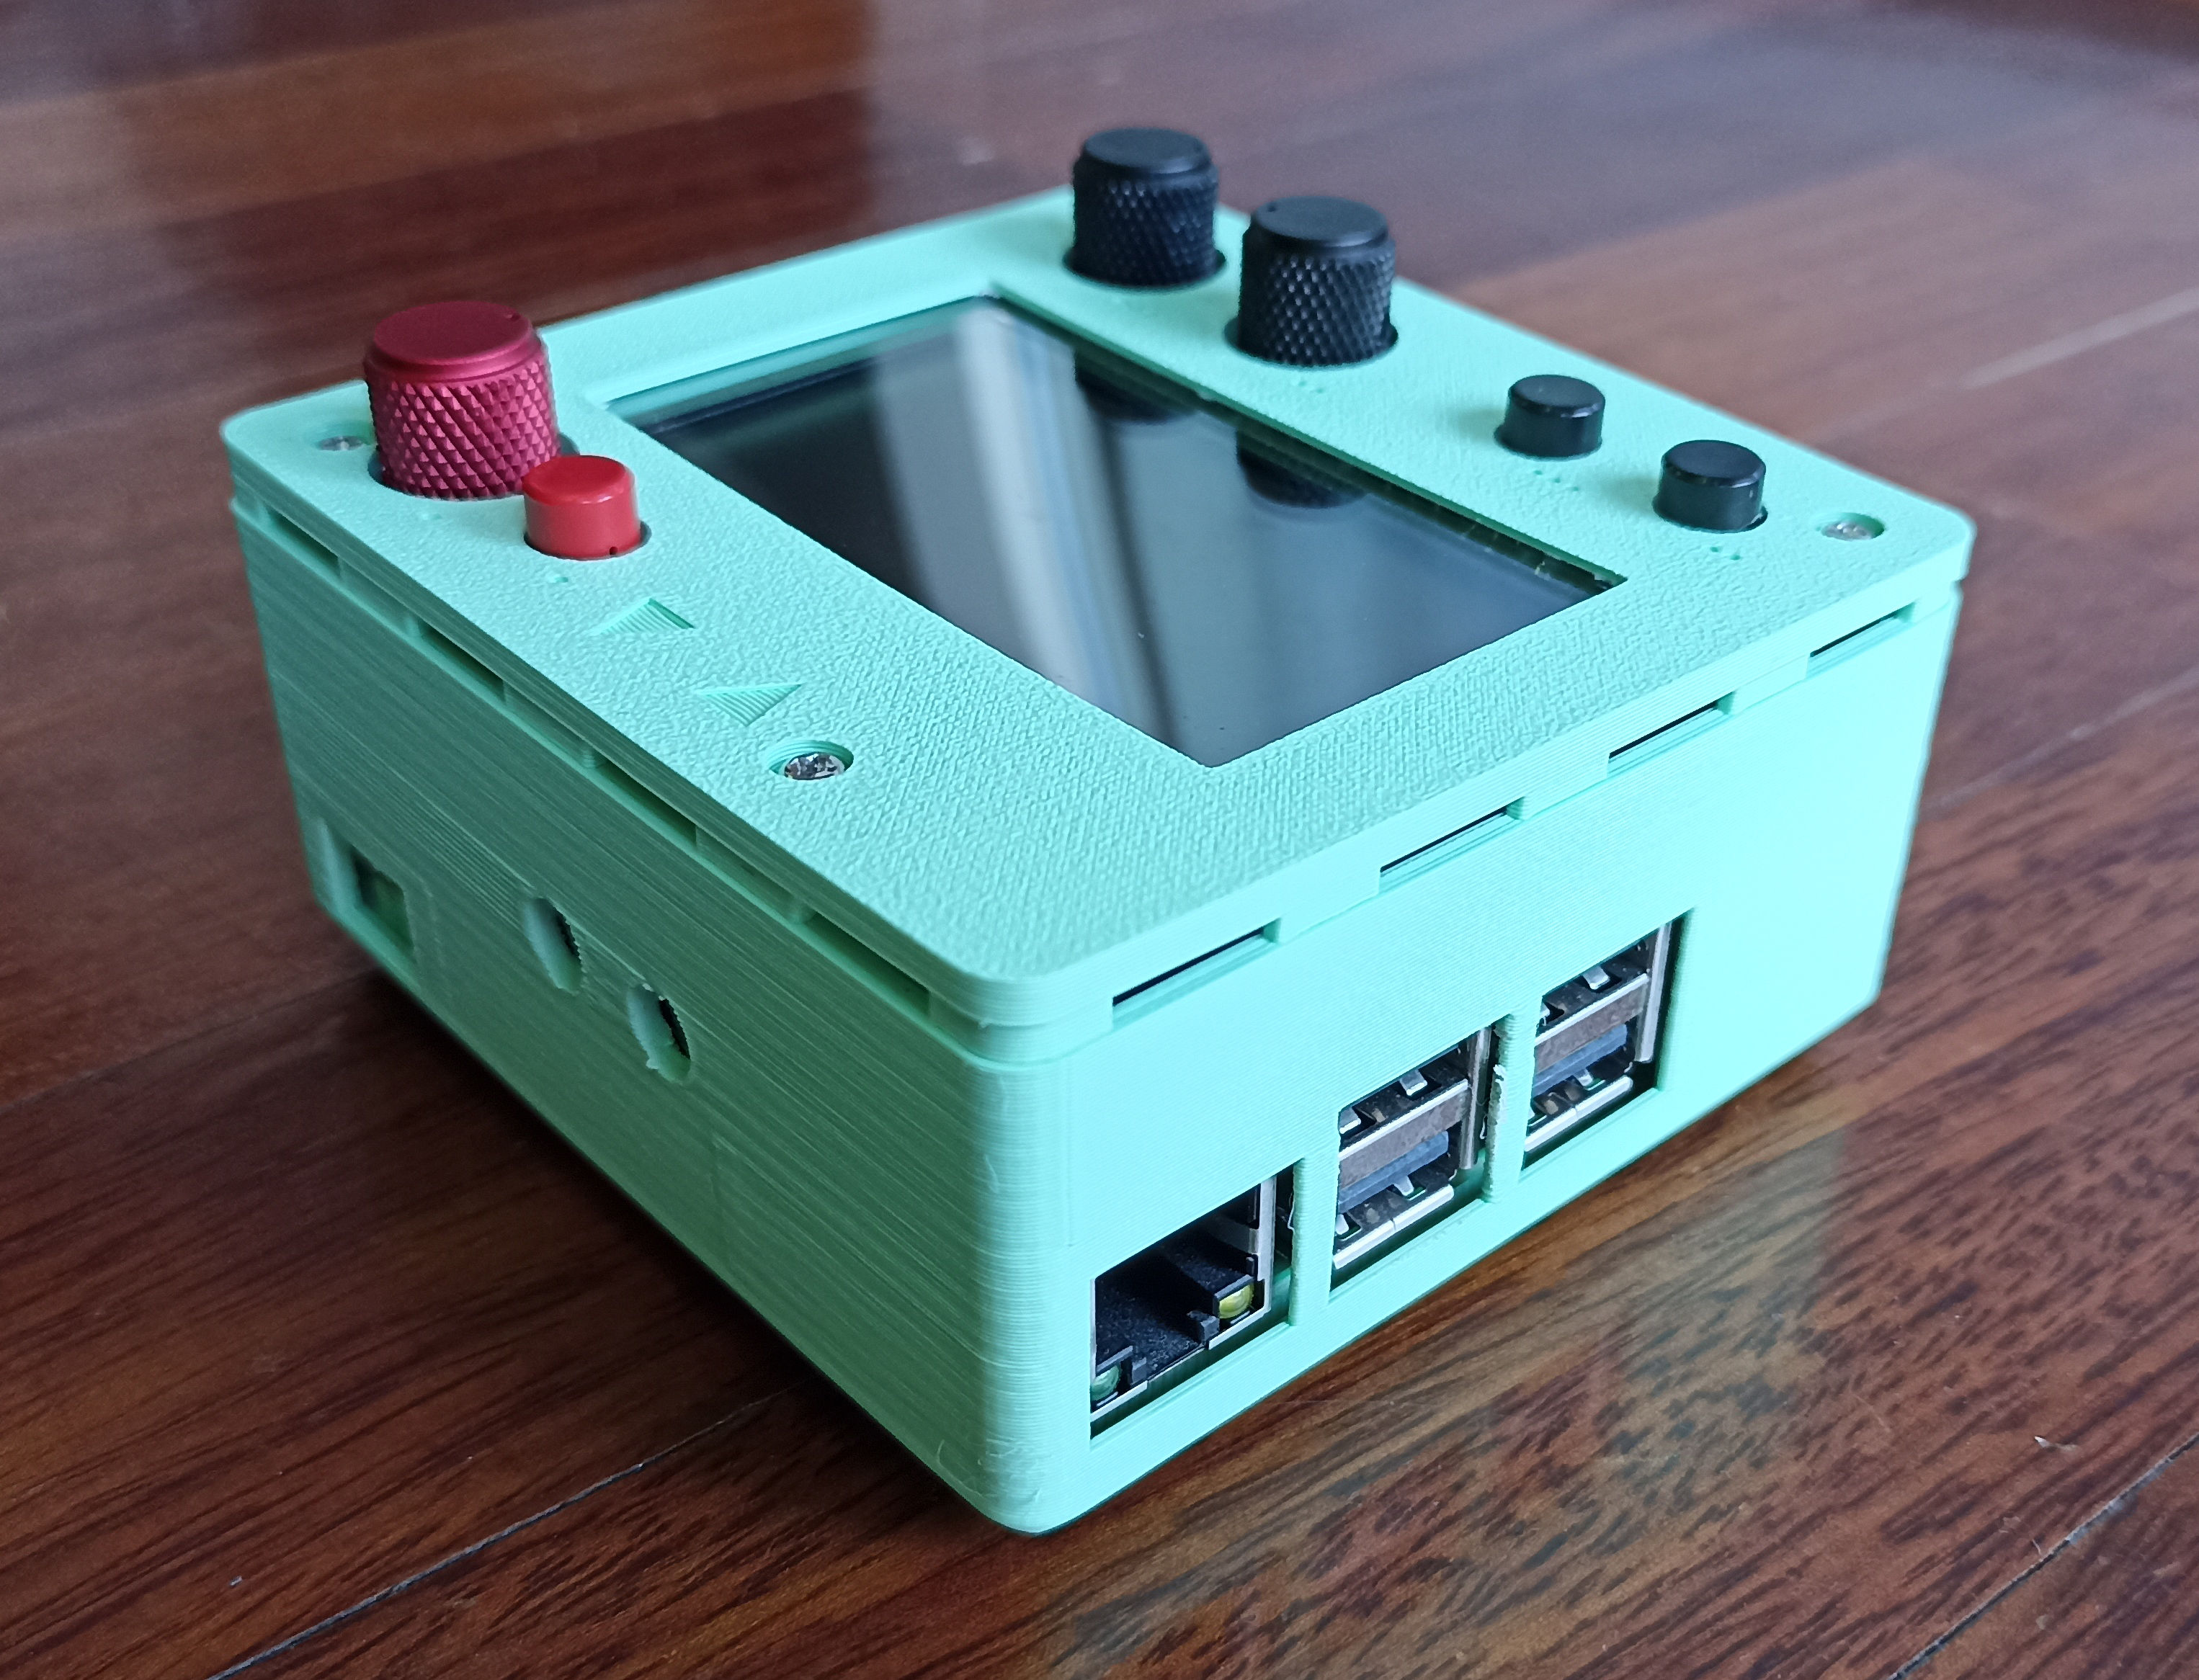
After I got the printer I tested my design and it turned out very good! "Very good" to be my first print at least LOL.
Here are some photos of the final product. You can find the STL and the needed hardware list on
my Printables account.
If you want to edit the Fusion360 files
here is a zip folder for you.
Please don't forget to give me credit. It means a lot to me <3
Now it's time for me to make some music... and maybe learn to code a patch for the norns! Who knows ¯\_(ツ)_/¯